Location Management
Last updated
Last updated
New in 1.27! Many new features and a new interface for Location Management was introduced in 1.27. See below for how to use these new features.
Location Management allows organisations to maintain a list of the sites, buildings and rooms relevant to their institution. In this context, site could refer to an institution, organization, or governing body. Site is the top tier of the location management system; within a site you can add buildings, and within a building you can add rooms. You can also add a phone number for the contact person at the site. Some examples are provided below.
Site: University/College Name, Hospital Name
Building(s): New Medical Building, Abramsky Hall, Student Athletic Centre
Room(s): 201A, 201B, 430, 431, The Caldwell Room
Phone Number: (123) 456 - 7890
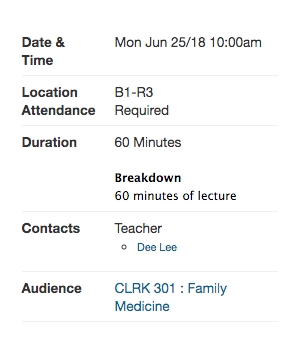
Using the locations feature is useful if you plan to schedule clinical rotations or learning events in Elentra. Rotations and their corresponding blocks/slots can be assigned to sites, and learning events can be assigned a site, building and room. The building and room code will be displayed to event attendees so make sure the short codes you use are logical.
Only medtech:admin users have access to Locations in System Settings.
Navigate to Admin > Location Management. This will allow you to manage locations within the organisation you are currently logged into.
Or alternatively:
Navigate to Admin > System Settings.
If you have access to multiple organisations, click on the name of the organisation you want to manage locations for.
Click 'Location Management' from the left sidebar.
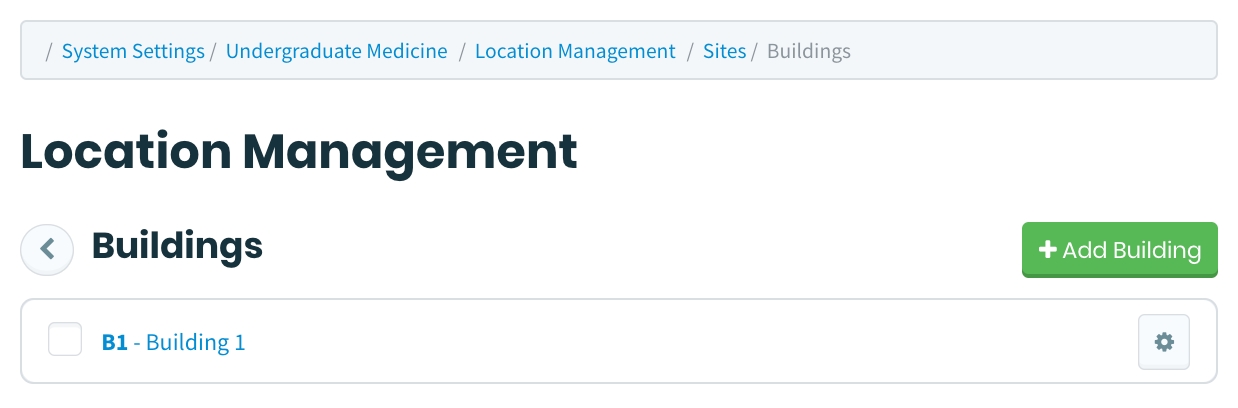
From the Location Management screen click the Plus button beside "Sites".
Provide the required information noting the following: Site Code: The site code will display with the name on dropdown menus when you are assigning a site (e.g., in a learning event or rotation). Province/State: This option will only be available after you have selected a country. Curriculum Tracks: Any Curriculum Tracks associated with a location will be displayed to admin users and learners via the Locations interface.
Click 'Save' and you will see your new site displayed on the existing list of sites.
Note: Location visibility and status will need to be set from the "Status & Visibility" tab.
Edit a site by selecting the pencil button to the right of the site within the site table.
To delete a site, check the checkbox for the sites you wish to delete and select "Delete Selected."
Note: Sites are "soft deleted" and can be retrieved by a developer"
Only Sites can be uploaded via CSV, Buildings and Rooms need to be manually input via the interface.
Sites can be uploaded via a CSV. A sample CSV can be downloaded by selecting "Import/Export" and selecting "Download Sample CSV".
Go to Admin > Manage Locations
Select "Import/Export"
Select "Download Sample CSV"
Within the CSV file, complete the template by filling in the Sites' information.
Site ID is a unique system identifier. It is generated automatically by the system at the time of upload.
Site Code is a short-hand identified that is displayed to users within the Rotation Scheduler, Lotteries and when building Learning Events.
This will be displayed within the Locations module and on Learning Event pages.
This will display within the Locations module, including a map of the Site.
This will display within the Locations module.
This will display within the Locations module. Depending on your Country this information may not be required.
This will display within the Locations module.
This will display within the Locations module.
This will NOT display within the Locations module, but it does display on Annual Reports.
This will display within the Locations module.
This will display within the Locations module.
This will NOT display within the Locations module.
Can be entered as either "Active" or "Inactive". Active will allow the Site to be selected and assigned within the Clinical Experiences module. Note: Sites previously assigned will persist if later set as Inactive.
Can be entered as 1 (visible) or 0 (hidden). Visible sites will be seen by Learners visiting the Locations module. Note: Hidden sites will remain visible outside of the Locations module (for example on learning events).
When creating new sites via CSV, leave the "Site ID" column empty. The system will generate an ID for any Site without a recognized "Site ID". If you want to update an existing site, find it by selecting the edit pencil button and noting the Site ID displayed in the title of the window, or in the right hand card when viewing Site Information. Enter that in the "Site ID" column and the system will update that site with the information provided within the CSV.
Site Code does not need to be unique, however the system will display a warning if it detects a duplicated Site Code.
When accessing the Manage Locations module as an admin, you'll see a list of Sites and the following information:
Name
Curriculum Tracks
City
State/Province
Status
Expiration Date (this is related to any agreements configured for this Site)
From this view, you can:
Search a Site by name
Sort the table by any column
Import/Export sites
Filter the sites by:
Curriculum Track
City
State/Province
Status
Agreement Status
Associated Instructors
Associated Curriculum Tags
When clicking on one specific Location's Name hyperlink, you can access and edit its details through the different tabs.
From this tab you can view all the information entered when creating this site including the following:
Mailing Address
Contact Information (including Phone Number and Fax Number)
A view of the site using Google Maps
The Site ID (this is used during the Site Import by CSV functionality
The number of Contacts currently associated with the Site (using the Contacts tab)
A list of any associated Curriculum Tracks
Adding, editing and deleting Buildings and Rooms behaves the same way as adding, editing and deleting Sites. Building's and Room's names can be searched for but not filtered or sorted like Sites.
Buildings use the following fields:
Building Name (Required): This will display on learning events scheduled in courses.
Building Code (Required): This will display on bookings made in Clinical Experiences > Rotation Schedule.
Address Line 1 (Required)
Address Line 2
City, Country, and Province/State (Required)
Postcode (Required)
Building Radius (meters): This is used in the attendance geo-location feature. It helps dictate how close to a building's latitude and longitude coordinates a learner's device must be when they confirm their attendance at an event.
Building Latitude: This is used in the attendance geo-location feature.
Building Longitude: This is used in the attendance geo-location feature.
Phone Number
Rooms use the following fields:
Floor: This is an optional field to record the floor a room is on.
Room Number (Required): Store the room number here. It will show on learning events assuming no room name exists.
Room Name: This field is optional. If it is filled in it will show, instead of the room number, on learning events.
Room Description: This is an optional field to collect information. Users will not see this information.
Room Phone Number: This is an optional field to collect information. Users will not see this information.
Room Max Occupancy (Required): While required, Users will not see this information.
Room Resources: This allows you to provide information about the resources in a room. The default list includes projector, television, computer, and capture. Capture is used when you are using Elentra's lecture capture tool.
If you select "Capture", you'll be prompted to enter the following information.
Device Name: This corresponds to the code in your NCast recorder manual that is specified for that model. For example, on an M4 recorder this value should be “M4”, whereas on a Hydra model, this code should be “PR720”.
Device Address: This is the IP or hostname of the NCast device on your network.
Channel: This is the number of the Channel to be used from NCast device’s configuration. Most devices have a limited range available, usually 1 - 100.
Stream Prefix: This is the named string of characters that all videos from this Room will be tagged with. For example, “surgery” or “pediatrics”.
Curriculum Tags Tab
Associate Curriculum Tags to the Site to allow Admins and Learners to filter Locations by the tag.
Clinical Experience
Sites with associated Curriculum Tags set as Sites for Rotations will display on the Clinical Rotation Scheduler when set to the "Detail" view mode.
Associate Instructors with Sites, allowing Learners to see which Instructors are associated with Sites, and allow Admin users to filter Sites by associated Instructors.
To associate Instructors:
Select the Add Instructor button (+) beside Instructors.
Search for and select instructors to be added and select "Save". More than one Instructor can be associated at once.
To remove an instructor:
Select the checkbox beside their name.
Select "Remove Selected".
Instructors must already be in the system before they can be associated with a Site.
Upload agreement documents and assign expiration dates to the Agreements Tab.
To add an Agreement:
Select the Add Agreement button (+) beside Agreements.
Fill in the fields and upload the agreement document, and select Save.
The Expiration Date column on the Locations Table View will be calculated based on the latest expiration date of all agreements.
The "Status" of a Site can be set to "Inactive" or "Active." When the Site is "Active", it can be associated to a Rotations' Location Pools. If the Site is "Inactive" it will not be listed as a Site to be assigned. If a site was already assigned to a Pool or already associated with Rotations and later set as "Inactive" it will persist in Pools and Rotations.
Locations (Sites, and associated Buildings and Rooms) set as "Inactive" will still appear when selecting a Location for an event.
The Visibility of a Site can be set to "Hidden" or "Visible". When a Site is "Visible", Learners can see it from the Locations page available to them, otherwise it is not displayed.
Locations (Sites, and associated Buildings and Rooms) set as "Hidden" will remain visible on Events they have been associated with.
The Status & Visibility fields per Location will be undefined (empty) by default and can be updated individually through the interface or in bulk with .csv. Undefined (empty) Sites will appear when selecting sites for Rotations or Pools.
Lists Contact information for individuals that will be displayed on the Learner view of Locations. This individuals are not users added through Manage Users.
To add a Contact:
Select the Add Contact (+) button beside Contacts.
Fill in the fields as required:
Prefix: This will display to Admin users, but not Learners.
First Name (Required): This will display to both Admin users and Learners.
Last Name (Required): This will display to both Admin users and Learners.
Role: Optionally select from the list of roles defined in the database (default is none). This will display to Admin users, but not Learners.
Mailing Address:
Address Line 1: This will display to Admin users, but not Learners.
Address Line 2: This will display to Admin users, but not Learners.
Country: This will display to Admin users, but not Learners.
Province/State (if applicable): This will display to Admin users, but not Learners.
City: This will display to Admin users, but not Learners.
Zip Code: This will display to Admin users, but not Learners.
Contact Information:
Phone Number: This will display to both Admin users and Learners.
Email: This will display to both Admin users and Learners.
Assigned Site: Optionally specify which of the Buildings or Rooms you'd like to associate with this Contact. This will display to both Admin users and Learners.
Contact Photo: This will display to Admin users, but not Learners.
Select "Save".
Stores information related to visits. This information won't be displayed to Learners. You are able to export this information as a CSV.
To add a Visit:
Select the Add Visit button (+)
Fill in the fields as required:
Date of Visit (Required): Specify a date of the visit.
Visit Outcome (Required): Select one of the following statuses
Incomplete
Complete
Pending
Probation
File Upload: This optional field will let you store a file related to the visit. It can be downloaded from the index.
Optional Notes: This optional field will let you add some additional text to the visit. While this field supports rich text, it will not be displayed on the index.
Select "Save".
To delete a Visit:
Select the checkbox beside the Visit you want to delete.
Select "Delete Selected".
Select "Yes, I would like to delete this visit record".
Select "Delete"