As you progress through building your Options, the option rotations you've added will appear as coloured cells in their respective Option's row. If you need to modify an individual option rotation, simply click on its coloured block in the timeline, and a context menu popover will be displayed, showing additional information about the rotation and some action buttons.
Clicking the Edit action button will open a form very similar to the one used to add a new option rotation, that will allow you to modify the chosen option rotation. You will be unable to Filter by Block, however all other controls are enabled, allowing you to change to a different rotation or block by length.
In the context menu popover that appears when a cell is clicked, there is also an Add Rotation button that is useful if you need to add multiple rotations that share the same time frame.
Clicking this button will display the Adding Rotation form. Any cells that occupy the same space in the timeline will be stacked, dividing and sharing the height of their row.
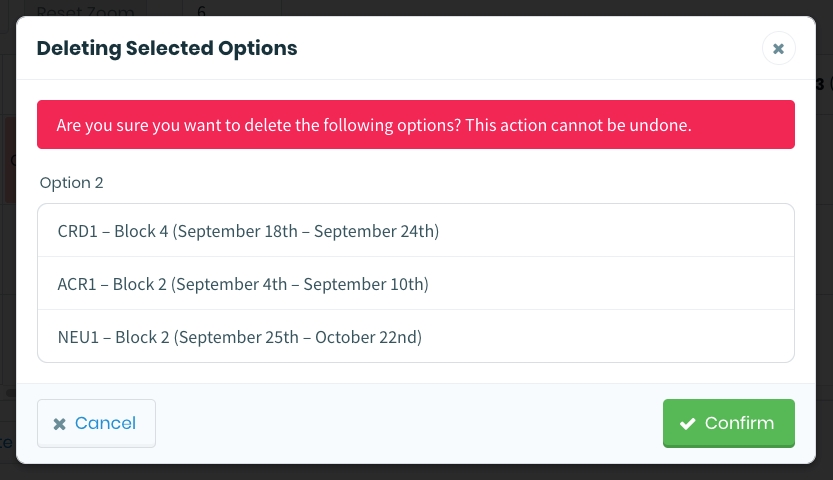
Much like the process for editing an option rotation, to delete one you must first open the context menu popover by clicking on the option rotation you would like to remove. When the popover is displayed, select the Delete button. A confirmation dialogue will be displayed, asking you to confirm your decision. Click Cancel to back out of the action, or Confirm to proceed with deletion.
An Option is an ordered sequence of rotations with some variance in rotations or timing. These options are built using the options builder located in the Options Overview. When a stage is "Open", the options will be presented to learners in a stacked list, which they will then rank in numerical order of preference. Once learners have submitted their preferences and the stage has closed, the drafting algorithm then uses their ranked, preferential data in its attempts to build schedule variations that grant the highest number of learners their most desired choices.
When the admin is building Options, they appear as individual rows in the Options Builder.
When a Learner is ranking the Options in order of preference in the Ranking Interface, they appear as separate, numbered cards with several controls. When a Learner-side Option card is checked, two chevron-icon buttons will appear, allowing the Learner to nudge the checked Option(s) up or down.
The Options Overview is reached by clicking the Manage Options button in the footer of a Stage Card. It is a focused view that displays a schedule-based interface for building the options that learners will eventually be ranking in order of preference.
A simplified version of the current lottery card appears at the top of the page, and just above that is a Lotteries link with a backwards-facing chevron button, which when clicked will return the administrator back to the Lotteries Overview. Similarly, below the simplified lottery card is a simplified stage card representing the focused stage, and a chevron button and Stages link to return the admin to the Stages Overview.
The core of the Managing Options interface is the option builder. Each row of the builder corresponds to one Option. Clicking any blank entry in the option row will open the form for Adding a Rotation, while clicking on an existing rotation in the row will display information about that rotation, and prompt the administrator to either Edit or Delete the rotation, if necessary.
Above the option builder on the right side, there is a button to Add Option rows to the builder. Each option also has a checkbox in the left-most column, and checking one or more of these inputs enables the action buttons below, which can be used to Delete or Duplicate the selected item(s).
Note: When more than one option is checked, only the Delete action will be enabled. Duplication may only be initiated on one checked option at a time.
While the Options Overview is designed to allow administrators to build and customize options for learners to rank, there are certain scenarios where modifying the options would cause undesired behaviour. For this reason, when viewing the Options Overview, certain stage statuses will cause the overview to be rendered in a read-only, non-modifiable state. One such case where this occurs is when the stage is open to learners, to prevent the options from changing while they are in the process of being ranked by the learners.
After creating and scheduling a Stage, your primary task is to create Options before the stage opens, so that Learners will have a variety of choices to rank by preference once it does. On any Stage Card that has not opened yet, there will be a Manage Options button, which you can click to arrive at the Options Overview.
From there, you should click the Add Option button to create your first Option, which will appear below, in an interface that looks and behaves similarly to Elentra’s rotation scheduler.
In this Options Builder interface, each row represents a separate Option, and the right column of the interface represents a timeline of the curriculum period divided visually as Blocks.
Rotation blocks are added by administrators to each Option, along their respective linear rows in the timeline, thereby creating different sequences of rotation blocks for each Option. Once this process is complete and the Stage reaches its opening date, Learners will be able to login and view the list of Options, and rank them in their order of preference.
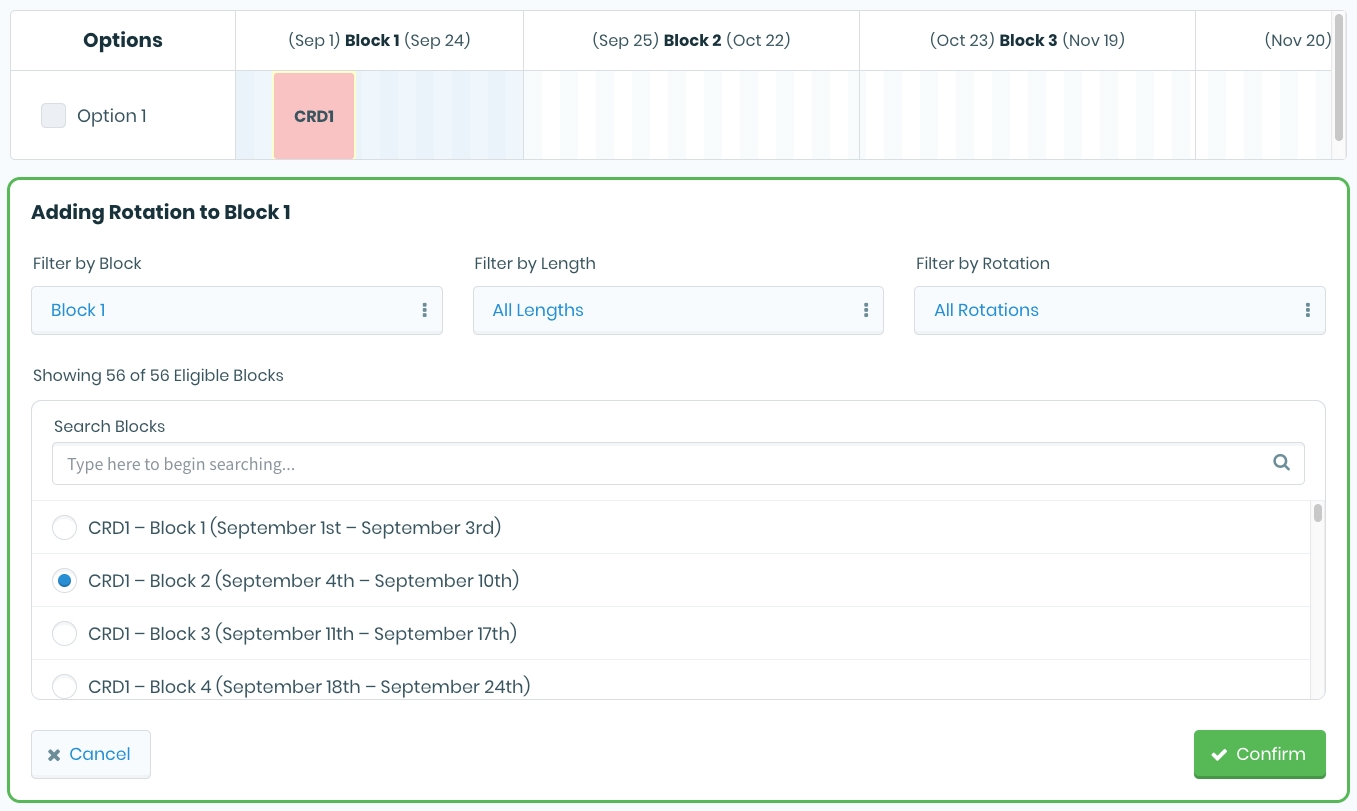
Clicking anywhere in the schedule portion of the Options Builder will open up a form below, that can be used to select which rotation and block should be added to the Option. The location where you click does matter, so make sure to click into the row corresponding to the Option where you would like to add the rotation.
Also take note of the grid divisions. As you hover over the schedule, it will highlight the hovered Block in light blue to let you know the timeframe or range where you would be adding the rotation, however this is also customizable in the form once it has been opened.
The form for Adding Rotations consists of a list of all available blocks, and above that, three dropdown selectors which are used to filter that list.
The first filter is Filter by Block, which will change the highlighted block in the schedule’s timeline showing you the start and end range of the Block. If you’ve clicked into the wrong Block in the horizontal timeline, you can change that with this filter.
The second filter is Filter by Length, which allows you to limit the rotation blocks you can choose from by their length (typically 1, 2, or 4 Weeks in length). The third and final filter is Filter by Rotation, which can be a very helpful starting point if you know the exact type of rotation but want to see the timing options available. As you modify and combine of these filters, the list below will adjust accordingly. Each Block for a Rotation is represented as a radio button row. If you click on one of these, it will become selected and a visual representation of the block’s timing and length will appear in the schedule timeline. You can click through as many of the rotation blocks as you like to see how they correspond to the the timeline and any other existing rotations.
Once you are satisfied with your choice, click the Confirm button on the form to lock it into the Option. You'll need to repeat this process for each Option, so that ideally that the Learner audience logs in they will have a good variety of choices to rank.
As you are building the Options, please note that if you find you have added a rotation block, but need to modify it at a later date, you can also Edit or Delete existing rotation entries in the builder.


