Loading...
Loading...
Loading...
Loading...
Loading...
Loading...
Loading...
Loading...
Loading...
Loading...
Loading...
Loading...
Loading...
The Curriculum Map Versions feature allows an organisation to create curriculum maps with specific linkages between curriculum tags. Each curriculum map includes curriculum periods and the curriculum tags and mapped relationships between tags are available to be applied to any features (courses, learning events, gradebook assessment entries, etc.) that exist with the curriculum periods included in a specific map.
Navigate to Admin>Manage Curriculum.
Click 'Curriculum Map Versions' from the left sidebar.
Click 'Add Version' and fill in the required fields noting the following: Version Status: Draft or published curriculum maps will be available when creating links between curriculum tags and will also be available to be copied to new map versions as needed.
Click on the appropriate curriculum layouts and a list of curriculum periods will be displayed. Click on the appropriate curriculum periods for this map version and save your work.
Repeat the steps above and in the Import Options section, tick off the checkbox.
Select the curriculum map version you wish to copy from the dropdown menu.
Click 'Save'.
This will create an identical curriculum map for the new map version which you can then edit as needed.
Hot Topics can be configured to include a list of items your organisation would like to track across learning events. Hot topics function somewhat like curriculum tag sets but they are not available to assign to courses or assessment items. For this reason, your organisation may prefer to build a hot topic taxonomy in the curriculum tag sets via Manage Curriculum. One feature of hot topics is that you can indicate whether teaching about a hot topic was major or minor in a learning event, however there is currently no way to report on this information.
Navigate to Admin>System Settings.
Select the organisation for which you want to manage hot topics.
Click Hot Topics from the left sidebar.
Click 'Add Hot Topic'.
Provide a name and description and click 'Save'.
To delete hot topics, click the checkbox beside the category you wish to delete and then scroll down and click 'Delete Selected'.
Navigate to a learning event you want to tag with a hot topic.
From Administrator View, click on the Content tab.
In the Event Objectives section scroll down to the Event Topics section. Click 'Event Topics' to make the list of topics visible.
Tick off the Major or Minor field as needed.
To deselect a topic, click the remove x.
Click 'Save'.
When a hot topic is tagged to a learning event, this information (including major or minor designation) is visible to learners on the learning event page.
Navigate to Admin>System Reports.
The Course Summary Report includes a column to show Hot Topics tagged to specific learning events.
From the Learning Event tab you can apply multiple filters to tailor the list of learning events you are viewing. One of the filters you can apply is Hot Topics. This allows you to generate a list of all events tagged with a specific hot topic.
This feature is optional and must be enabled in the settings file to be accessible through the user interface.
Context-based curriculum linkages allow you to map relationships between curriculum tags at the course, event, and unit level. These mapped relationships will be visible on the course, unit, and event pages. While this feature creates records of information in the same way that linking curriculum tags through Admin>Manage Curriculum does, the display capabilities are quite different. Using context-based linkages will allow users to click on curriculum tags from within units and events and see the mapped relationships.
There are different areas where you can build context-based linkages and often they are used in conjunction with the Units feature.
Assign curriculum tags to a course and link them to other curriculum tags. Do this from a course setup page. Assign curriculum tags to a unit and link them to other curriculum tags. The list of tags assigned to a unit will be displayed under Week's Objectives. This information, including the context-based linkages, will also display under the Unit Tags section of a weeks page. Do this from a course unit page. Assign curriculum tags to a learning event and link them to other curriculum tags. If you link your event level objectives to a unit tag the learning event will display on the list of week's objectives and show the connection to the unit objective. Do this from a learning event page.
Having a list of events display on a week's page actually comes from linking the event to a unit, not the context-based curriculum tags.\
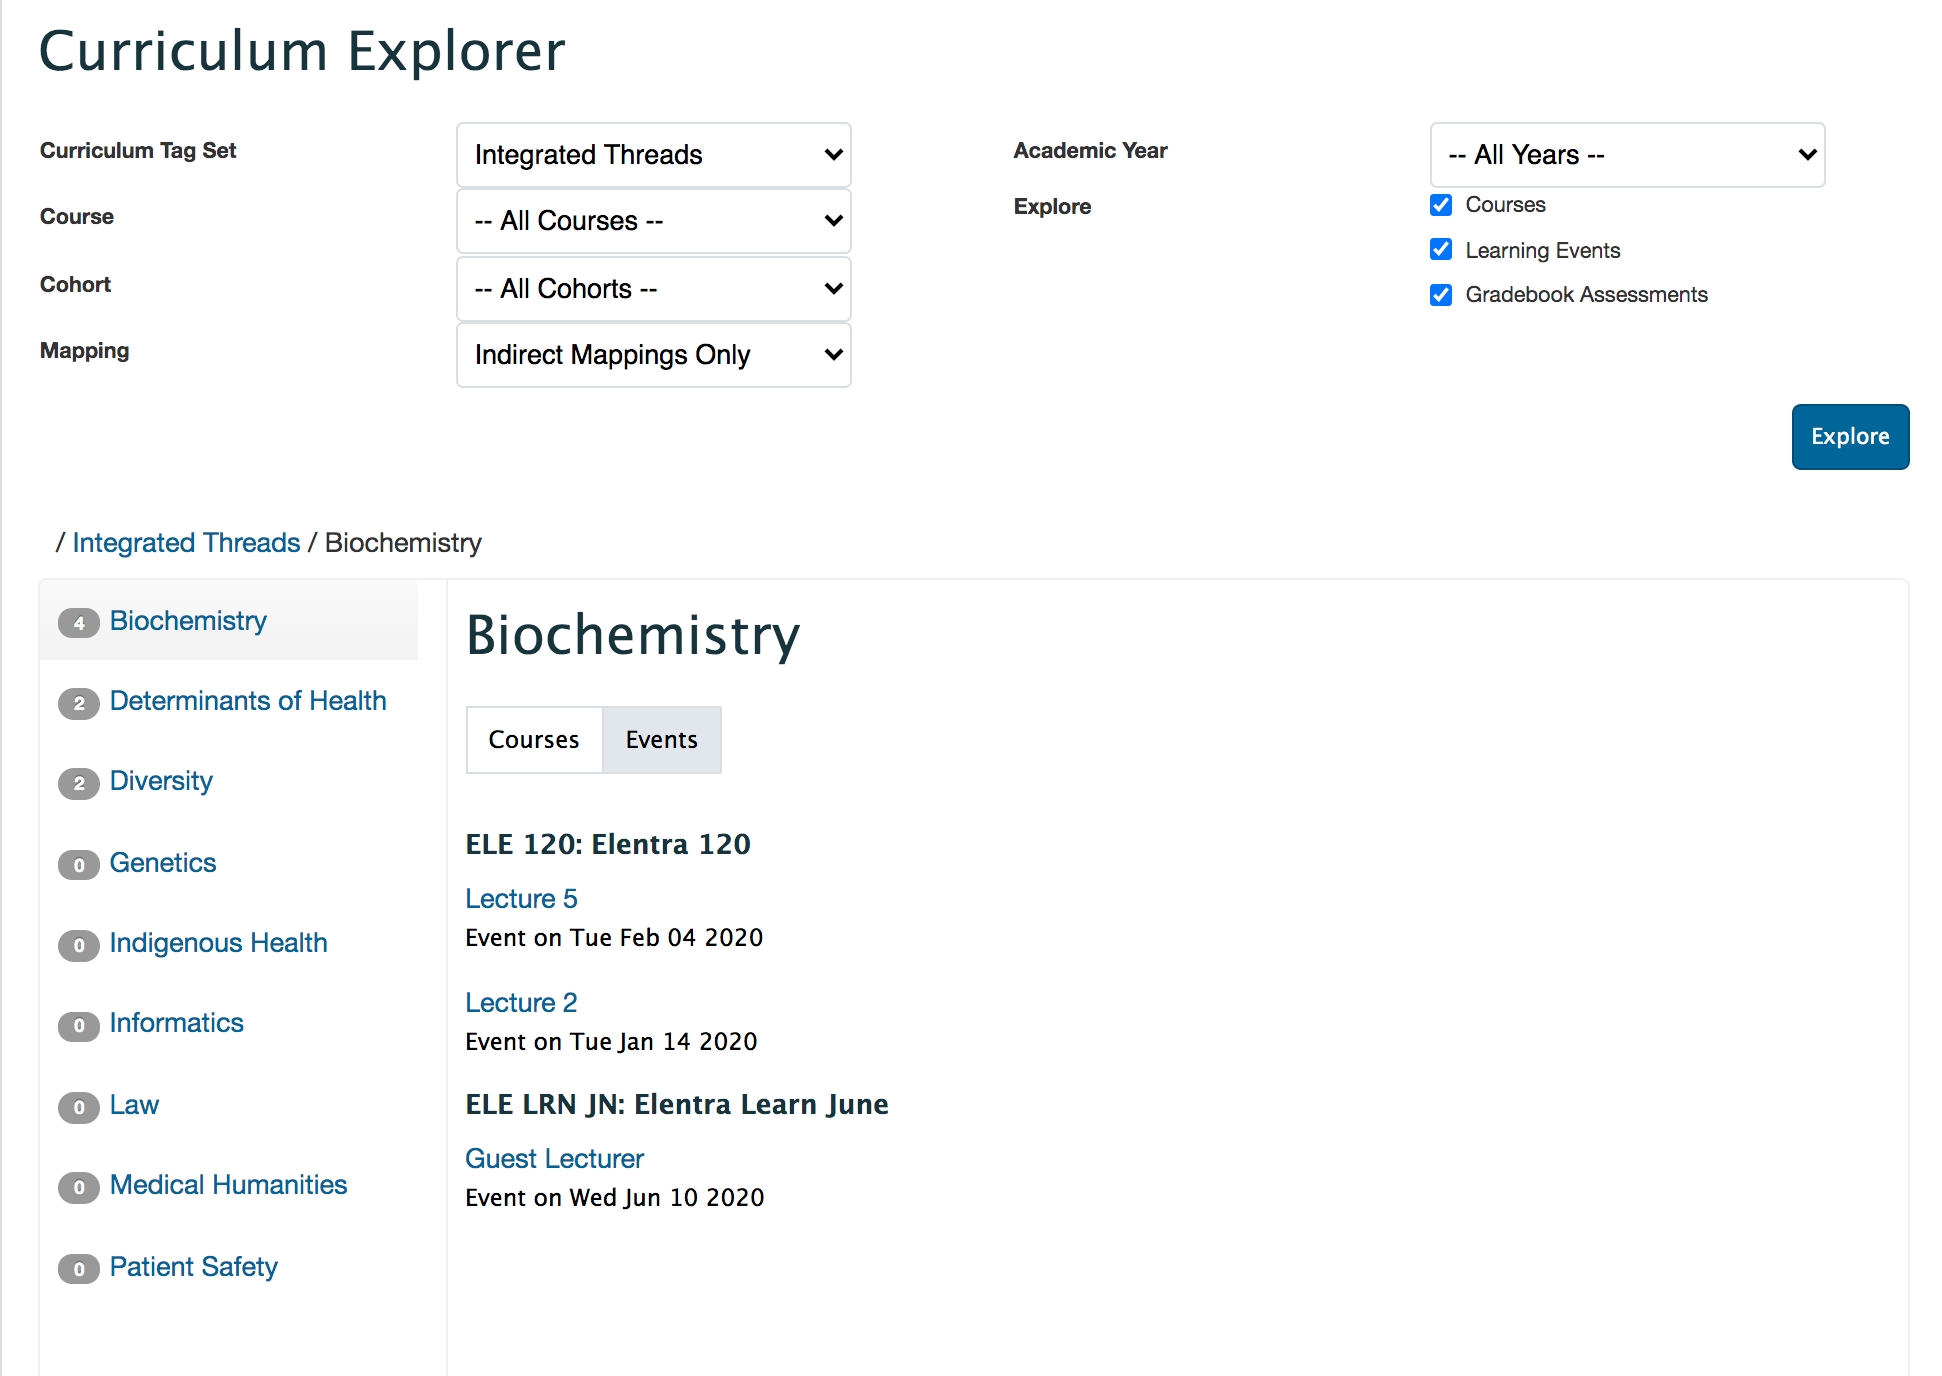
The Curriculum Explorer is available to all users by default and allows you to filter by curriculum tag set, course, cohort, mapping relationship and academic year, in order to see where a specific curriculum tag has been applied to a course, learning event, or assessment.
The results returned in the Gradebook Assessments section does not return results for individual exam items, nor for Assessment and Evaluation forms. Learners accessing Curriculum Explorer will not have the option to explore Gradebook Assessments.
Curriculum Explorer does not currently reflect the parent-child relationship if you create recurring events using the parent-child relationship. It will display results for all events that have been tagged with the relevant curriculum tag.
You can watch a recording about Curriculum Explorer at collaborate.elentra.org (login required).
Select a curriculum tag set from the dropdown menu.
Select a course, cohort, mapping and or academic year to limit your results. Each field is optional.
In the Mapping Section you can specify the kind of linked curriculum tags you are looking for.
Direct Mappings includes tags that have been assigned to specific resources (e.g. course, event, gradebook assessment)
Indirect Mappings includes tags have been mapped to other tags either at the organizational level in Admin > Manage Curriculum OR contextually, and that other tag is assigned to a specific resource
By default, the system will return results for courses, learning events and Gradebook assessments (when the user has permission to view).
If you want to omit a category, deselect it.
Results on the Events tab will be grouped under the relevant course.
Click 'Explore'.
In the left pane, you'll see a list of curriculum tags and the number of times they are tagged based on the filters set.
The badge shows the number of resources (e.g., events, courses and assessments) assigned to that tag and any of its descendants if it's part of a hierarchical tag set.
Each level also includes the resources from the previous, higher level. So if Tag A is assigned to Course 1, when you navigate to A’s child (A.1) Course 1 will still be displayed there.
Click on a specific curriculum tag to view its results or to drill down to additional tags if the set has a hierarchy.
In the right pane, switch between views of courses, events, and assessments tagged with the objective.
Each tab will only show up if there are results returned for it.
There is not currently an export tool associated with the Curriculum Explorer.
Curriculum Tracks can be used to create specializations or concentrations within programs or to show a course’s language of instruction. If curriculum tracks are created you can:
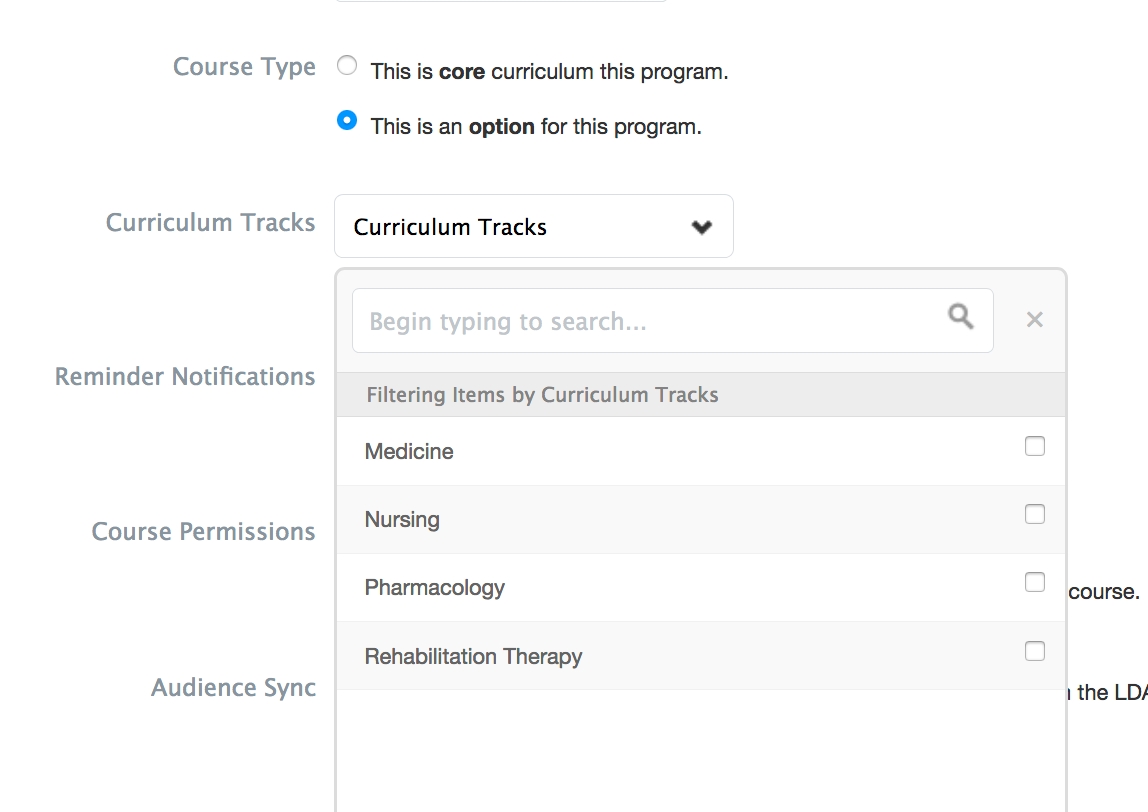
assign a track to a course
assign a track to a student user
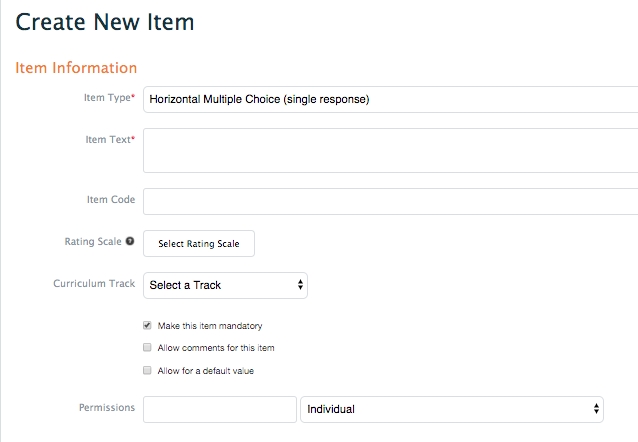
assign a track to an Assessment and Evaluation items, forms and distributions
Curriculum Tracks can be disabled for an organization through a database system setting (disable_curriculum_tracks) This will hide Curriculum Tracks from the System Settings so no administrative users can create tracks. Note that if you have existing curriculum tracks configured and then disable Curriculum Tracks in the database, the existing tracks will still display in the user interface.
Navigate to Admin > Manage Curriculum.
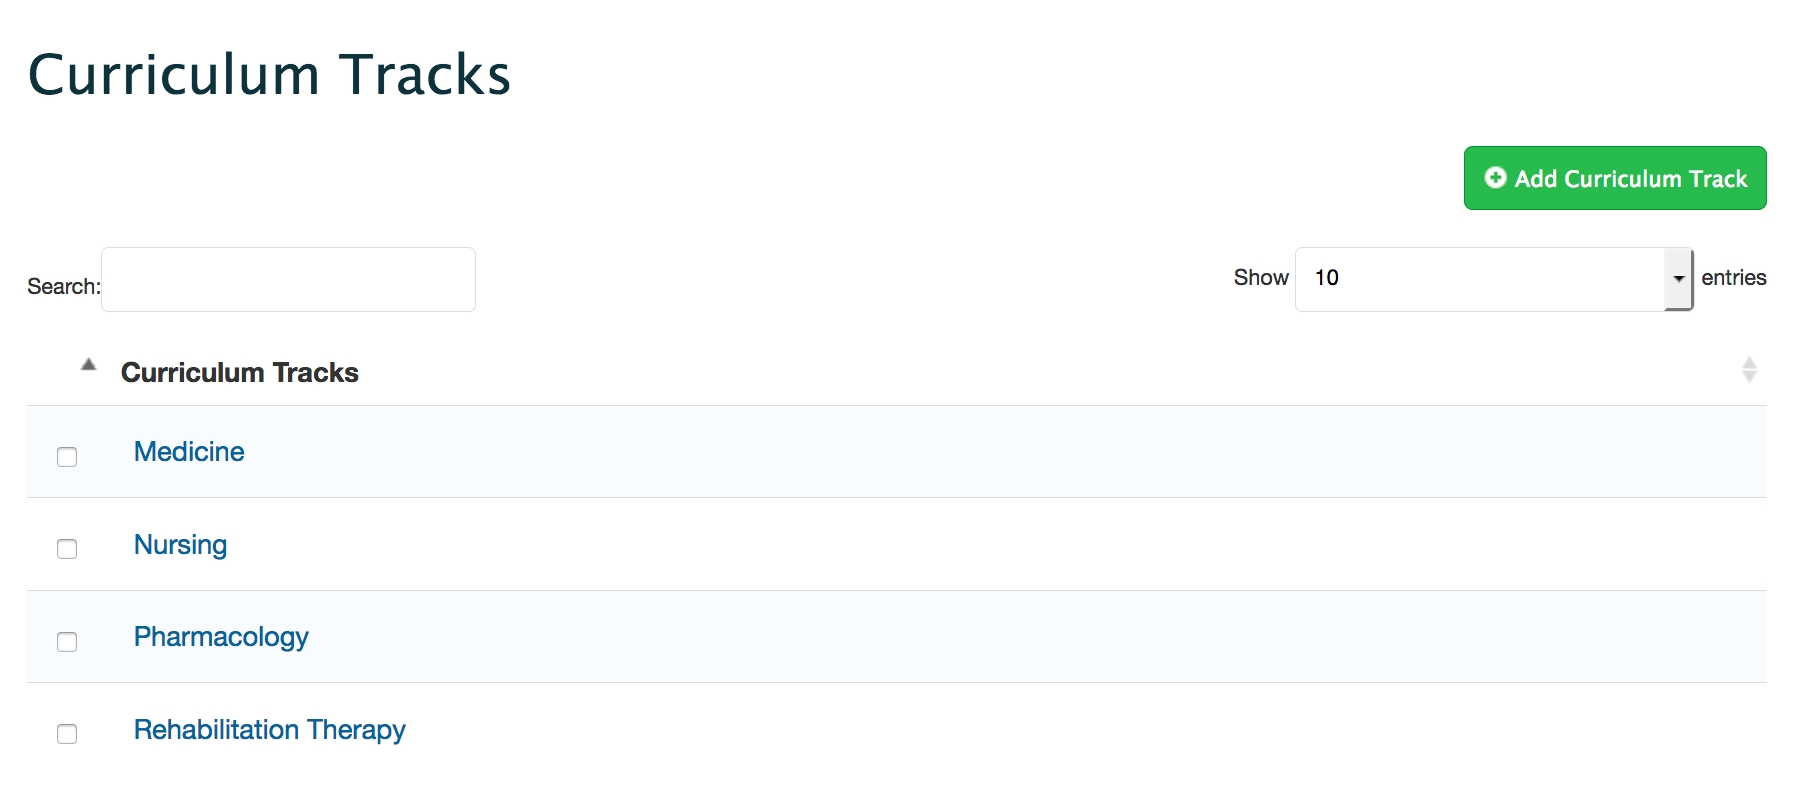
Select 'Curriculum Tracks' from the left sidebar.
Click 'Add Curriculum Track'.
Fill in the required information noting the following: Track Public URL: If the track has a public URL you'd like to make available, provide it here.
Set a display order. Curriculum Tracks will not automatically display alphabetically.
Click 'Save'.
After a track is created you can add an image for the track. Click on the track name to access the Edit Curriculum Track page and then upload an image via the small gray square on the right side. As of ME 1.12, these images will not be displayed anywhere in Elentra.
To quickly change the display order of tracks on the main Curriculum Tracks page drag and drop them into new positions and click 'Save Ordering'.
To delete unneeded tracks click the checkbox beside the track name and click 'Delete Selected'.
Adding courses to a curriculum track is done via individual course setup pages. Please see the the Courses help section for more information.
Note that you'll only be able to assign students users to a curriculum track if you have tracks built for the relevant organization.
Navigate to Admin>Manage Users.
Search for the appropriate user and click on his or her name to access their user profile page.
Scroll down to the permissions section. If an existing permission exists in an organization that has curriculum tracks, you'll be able to select the appropriate track from a dropdown menu.
If you are creating a new permission you'll have to add it first and then select the relevant curriculum track from the dropdown menu.
Click 'Save' at the bottom of the page when you are done.
Whether you are working with items, forms or distributions, you will see an option to assign a curriculum track if needed.
Curriculum layouts define the general blocks of time used within an organization to manage teaching and learning. Examples include year, term, semester, phase, blocks, etc. Courses, modules, or whatever more granular units of instruction are called at your institution live within a curriculum layout.
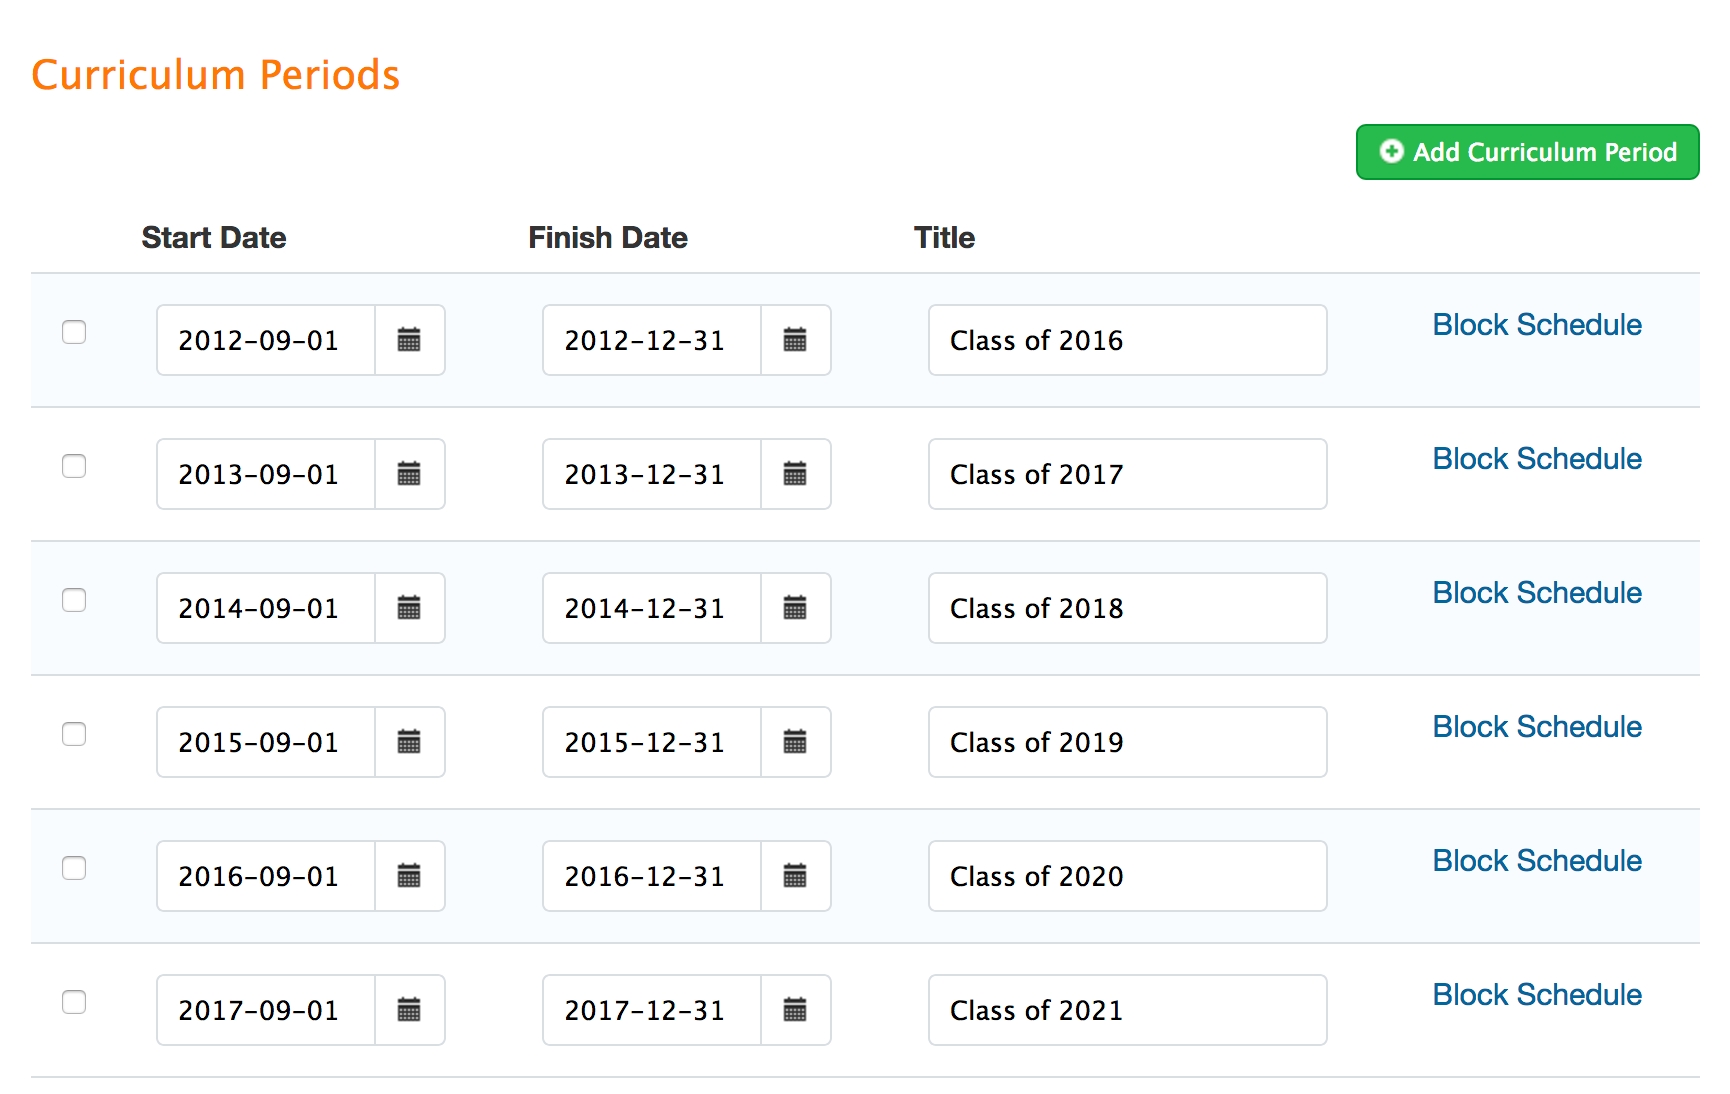
Within each curriculum layout, curriculum periods are added. A curriculum period has a defined start and end date and is often associated with a specific cohort of learners. An example of three curriculum periods within one layout would be:
Term 1 Class of 2021, Sept. 2017-Dec. 2017
Term 1 Class of 2020, Sept. 2016-Dec. 2016
Term 1 Class of 2019, Sept. 2015-Dec. 2015
One curriculum layout can have multiple curriculum periods. Curriculum periods are required when creating the audience and enrolment for courses/programs and multiple features and reports in Elentra rely on curriculum periods to filter information.
Navigate to Admin>Manage Curriculum.
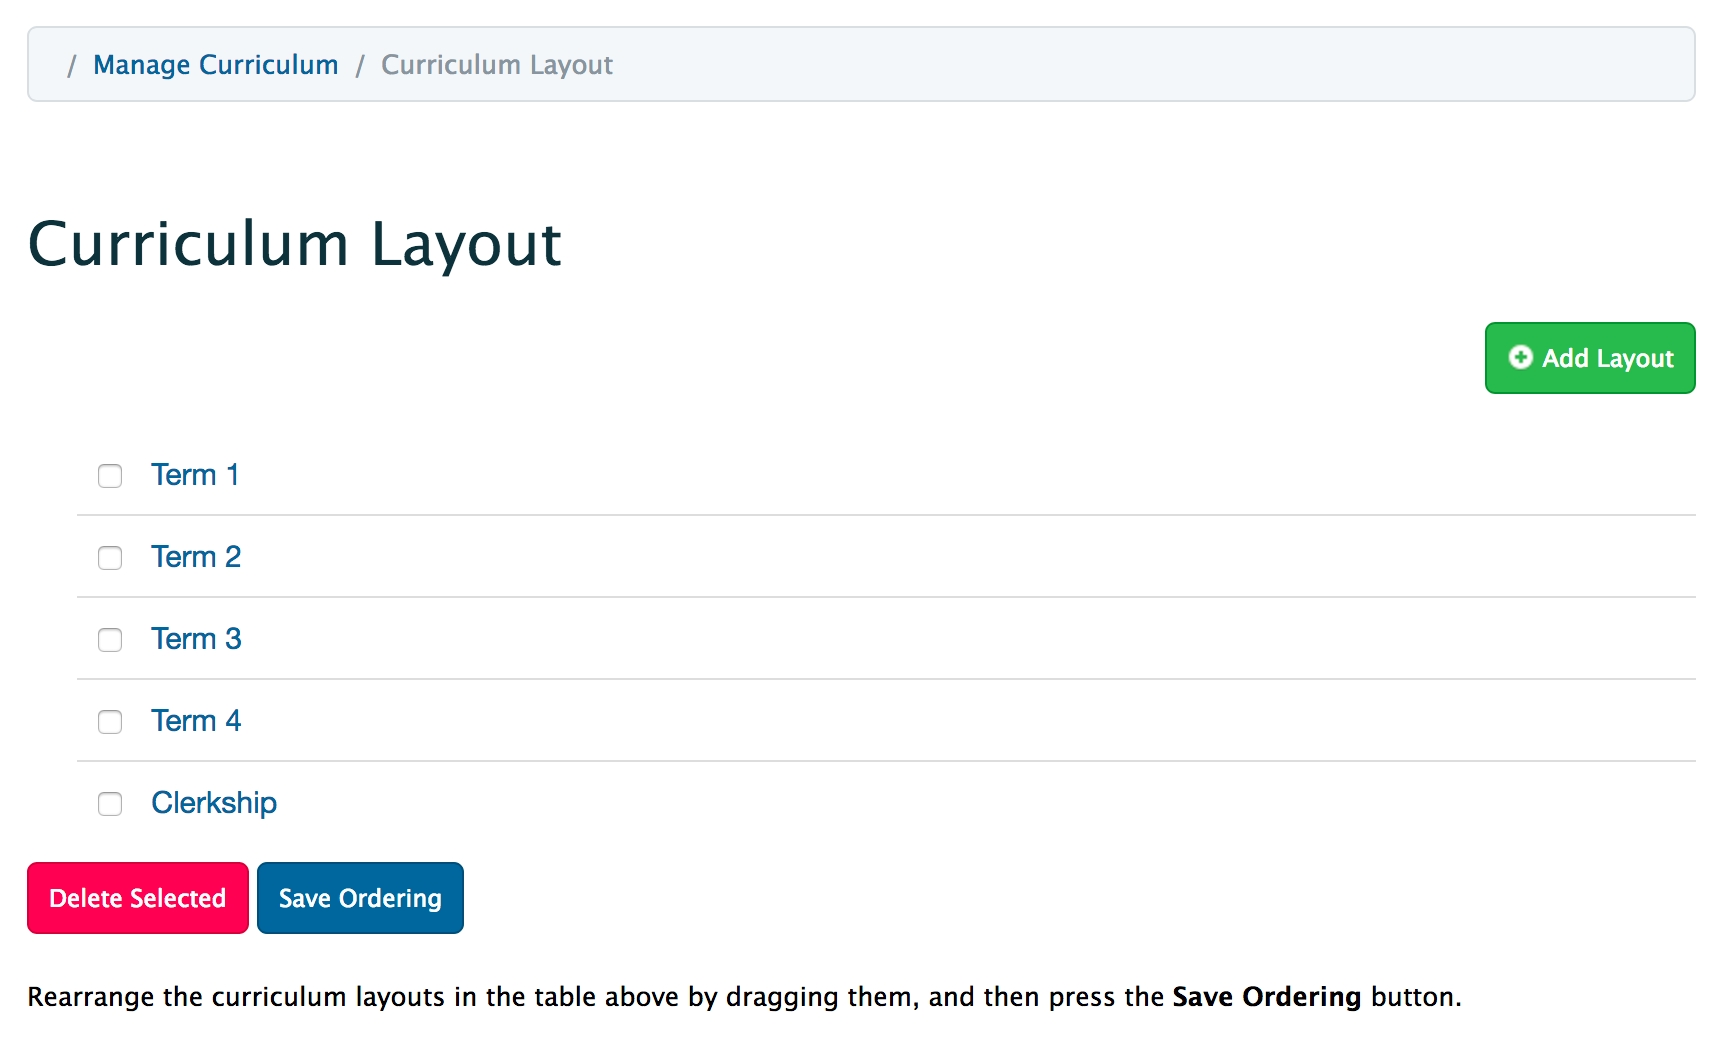
Click 'Curriculum Layout' from the left sidebar.
Click 'Add Layout'.
Complete the required information, noting the following:
Curriculum Level: This field collects data but is not used elsewhere in the system. There is no user interface to define the levels used in the dropdown selector. If you want to change pre-clinical and clinical to other terms, you'll need help from a developer.
Click 'Save' or immediately add curriculum periods and then save your work.
From the Curriculum Layout page, click on an existing curriculum layout.
Click 'Add Curriculum Period'.
In the line added below, adjust the start and end date for the curriculum period, add a title (e.g. the relevant cohort), and leave the final column as active.
Scroll up if necessary and click 'Save'.
Click on and drag a curriculum layout row to the appropriate place in the list and then click 'Save Ordering'.
Click the checkbox beside the layout you wish to delete.
Click 'Delete Selected'.
From the Curriculum Layout page, click on an existing curriculum layout.
Click the checkbox beside the curriculum period you want to delete.
Click 'Deactivate'.
If a specific curriculum period is a time when learners will participate in clinical learning experiences, you can automatically create a block schedule to apply to that curriculum period. This allows for easy scheduling of clinical learning experiences. Detailed instructions for this process are included in the Curriculum>Rotation Blocks help section.\
Blocks should be created for curriculum periods in which associated courses will have clinical learning experiences (e.g., clerkship, residency rotations). Later, you'll use blocks to build slots in the rotation scheduler.
Once a rotation schedule has been built and rotations created using the block schedule templates, any changes made to the block schedule template in a curriculum period will not be inherited by the existing rotation schedules. You will need to either rebuild your rotations or if they have already been extensively used, adjust the block dates per rotation.
You must be logged in with an administrator role to create blocks.
Navigate to Admin>Manage Curriculum.
Click 'Curriculum Layout' from the left sidebar.
Click on the appropriate curriculum layout.
Beside the appropriate curriculum period, click 'Block Schedule'.
Click 'New' in the bottom right.
Provide a Schedule Title (e.g. 1 Week Blocks or Psychiatry Rotations) and description as desired. The title is the title of the set of blocks, not the individual blocks. The start and end dates for the schedule are set by the curriculum period within which you are creating the blocks (you will be able to alter the individual block dates after they have been created).
Click 'Save'.
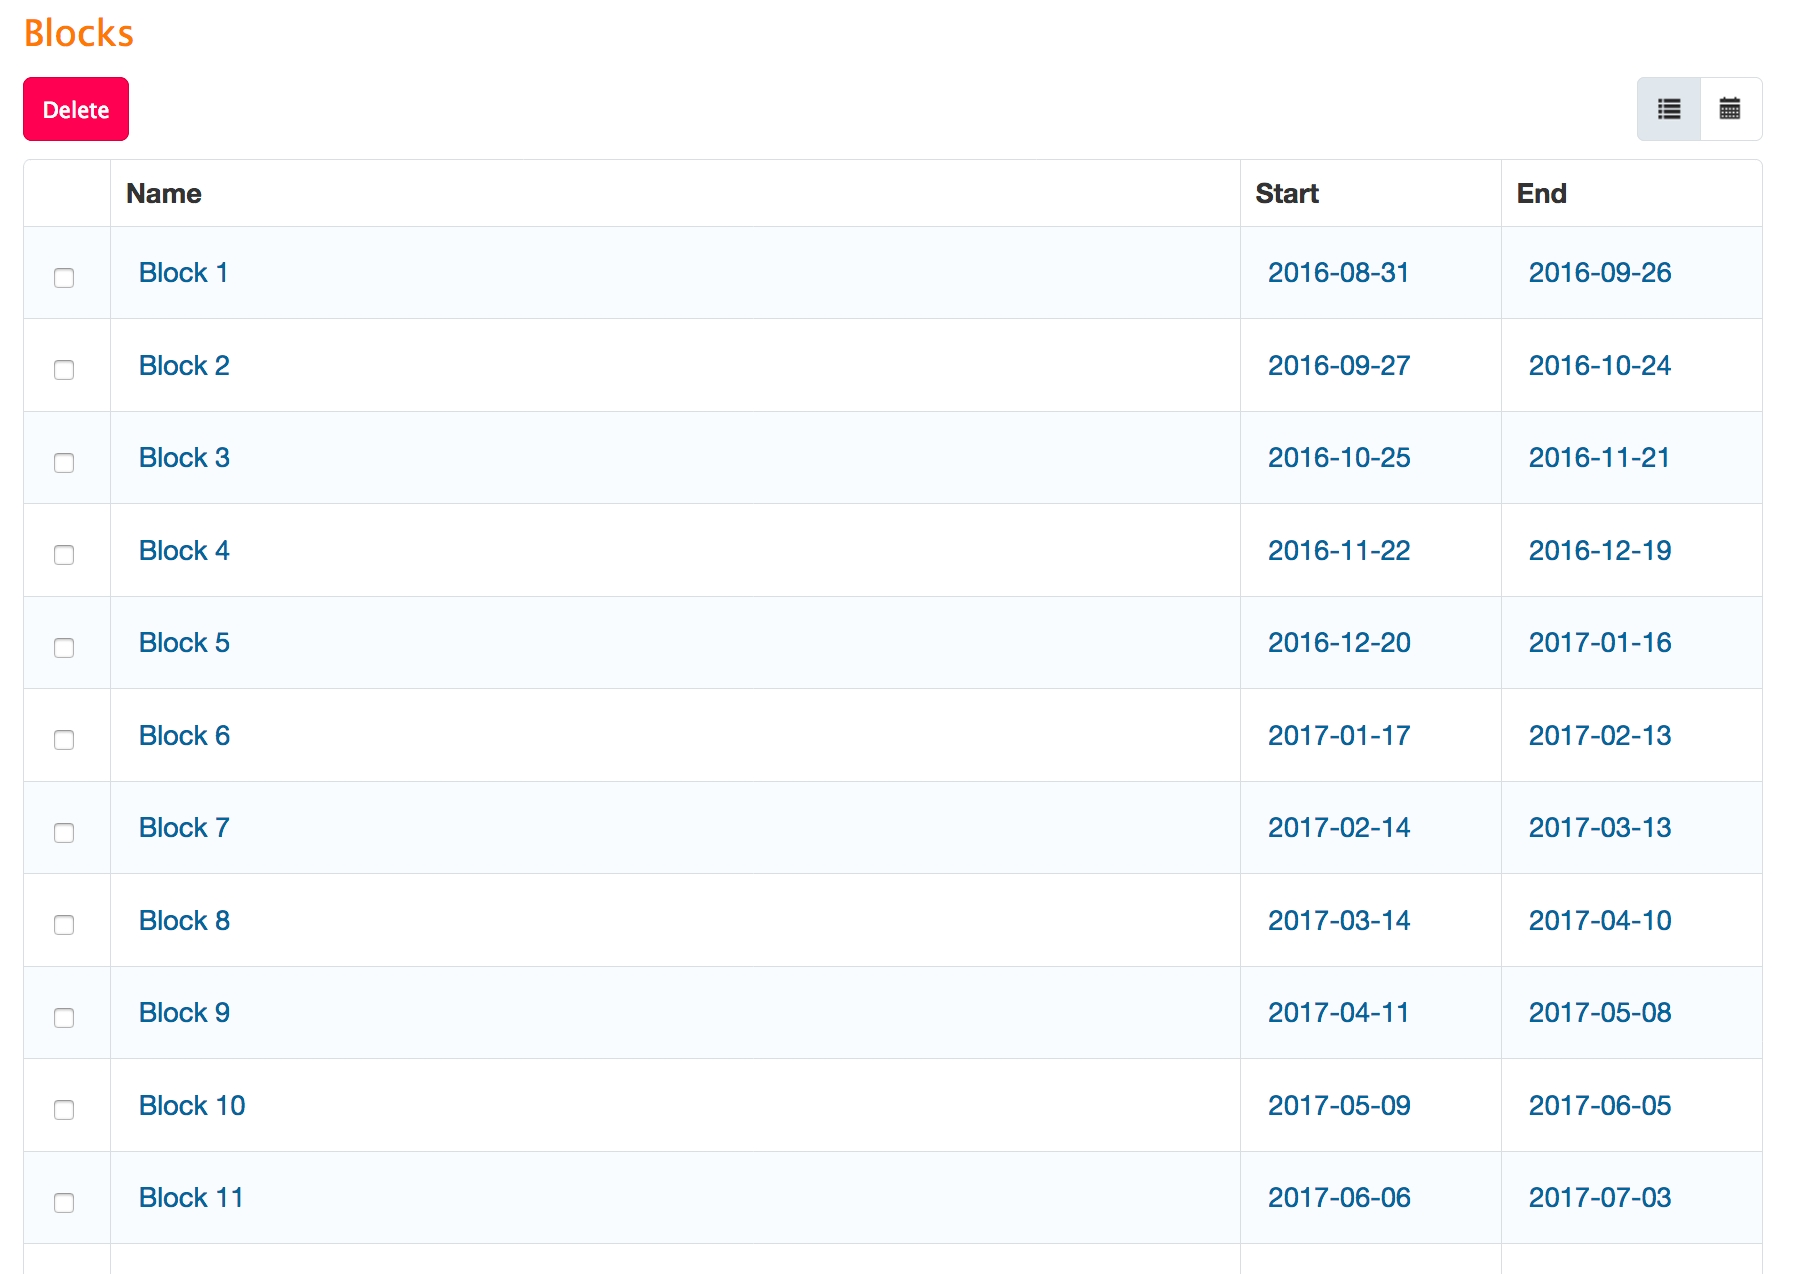
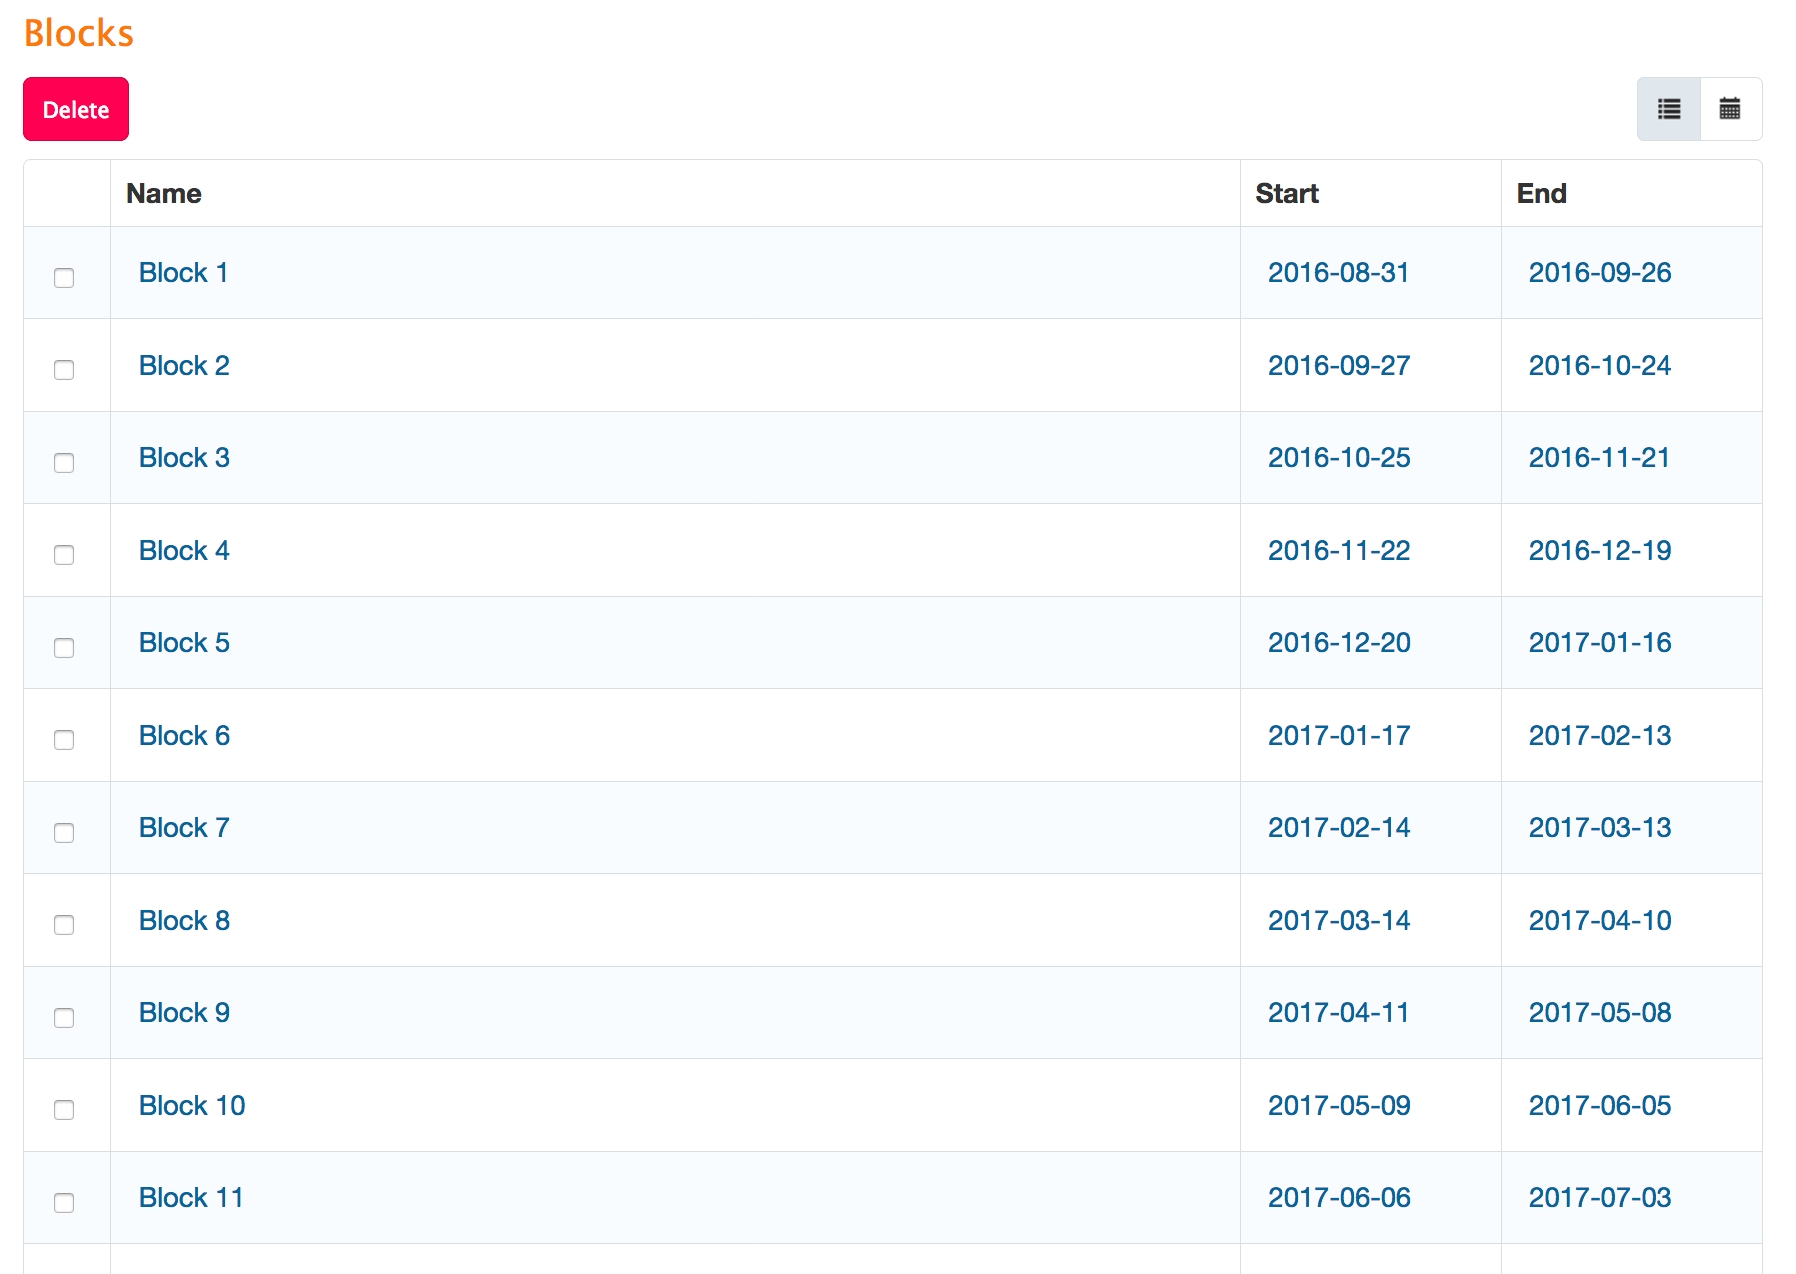
Now you can create the actual blocks of time within this schedule. Block Type: By default you'll see one, two and four week blocks. (If you'd like to build blocks of different lengths you can get a developer to make a database change to facilitate this.) Block End Day: This is the day you want blocks to end. Start and End Date: Set by the curriculum period in which you are creating these blocks. First Block End Date: Optional. You can use this to force the first block to end on a specific date (useful if the curriculum period starts on an irregular day).
Click the down arrow beside Save and select Autogenerate Blocks; a list of blocks will appear.
Click on any row to edit the block name, or the start and end dates.
You can also add a custom block by clicking 'Add' in the bottom right and providing the required information.
When you have made the required adjustments to the block schedule, click 'Save' on the right above the list of blocks.
You can add multiple sets of blocks to one curriculum period. For example, you might add a set of one, two and four week blocks to one curriculum period. This allows you to schedule learners across blocks of varying lengths during their clinical learning experience.
Toggle between a list and calendar view of blocks using the list and calendar icons above the block end dates. (Note that as of ME 1.12 the calendar icon does not properly display blocks.)
The Curriculum Framework Builder was introduced in Elentra ME 1.24. Its primary use is to configure curriculum tags that can be used on assessment forms and reported on via learner and program dashboards as part of Elentra's Competency-Based Education tools.
While curriculum tags added via the framework builder and its resulting organization and course trees do become accessible for tagging in other parts of Elentra (e.g. Courses, Events, etc.), not all functionality using Elentra's existing curriculum mapping tools is supported using CBE tags.
Additional details about using the Curriculum Framework Builder to support Competency-Based Education can be found here.
The Curriculum Matrix is available to all users by default and provides a quick visual and numerical inventory of where curriculum tags are assigned to courses. The Matrix reflects only those curriculum tags that have been assigned to a course through the Course Setup page, not all tags applied to events, gradebook assessments, etc.
Curriculum Matrix does not currently reflect relationships between mapped tags. It just shows those tags directly assigned to a course. (If context-based linkages are enabled the Matrix shows curriculum tags assigned to the course on initial setup and any added afterwards in the "Course Tags" section.)
The Curriculum Matrix can be a useful tool to help identify where curriculum objectives might be under or over-represented.
The information stored in the Curriculum Matrix can be downloaded as a csv file.
You can watch a recording about the Curriculum Matrix at collaborate.elentra.org (login required).
Navigate to Curriculum>Curriculum Matrix.
Use the Curriculum Tag Set selector to pick a tag set. If the tag set you select includes multiple hierarchies, adjust which hierarchy you are viewing using the small grey numbers to the right of the tag set selector.
Results will display on the screen. A star indicates that a tag is assigned to a course. The number is the column header indicates how many courses the tag is assigned to.
If viewing a tag set with hierarchies, some column headers may appear blue. Click on the tag to open the next hierarchy of tags.
Collapse the view of specific curriculum layouts (e.g., term or year) by clicking on the +/- button beside the layout name.
Click on the name of a tag to see its description (if applicable).
Click 'Download' to download the results of the Matrix in a CSV file.
Curriculum Tag Sets are the different taxonomies an organization uses to tag and track content across the system. The sets are customizable and within each set you can have a hierarchy of tags. Examples of curriculum tag sets include school objectives, clinical presentations, diagnoses, etc. These tags can be applied to courses, learning events, assessment items, exam questions, portfolio artifacts, learning objects, etc. Tag sets can be used as filters when searching the curriculum and are used in multiple reports.
While curriculum tag sets and curriculum tags are connected, there are differences in their creation and management. You must create a tag set first and then populate it with curriculum tags.
Navigate to Admin>Manage Curriculum.
Click 'Curriculum Tags' from the left sidebar.
Click 'Add Tag Set'.
Complete the required information noting the following:
Tag Set Details:
Title and shortname are required for the tag set. The title is displayed to users when using curriculum tags to label things and when using curriculum search tools.
Standardization: This field was developed for the Competency-Based Medical Education tools in Elentra and identifies a tag set that is standard across multiple courses/programs. It is applicable to the "Stages" tag set that is required in CBME, but can be ignored when creating other tag sets.
Applicable to: Usually curriculum tag sets are applicable to all courses, however you can adjust the setting, if needed. This will control which courses are able to use this tag set to tag learning events and gradebook assessments. (If you are using context-based linkages to tag curriculum that feature will allow access to all curriculum tag sets including those set to be applicable to only some courses.)
Tag Options:
This defines the information and requirements for any tags added to this set. You can control whether there will be a space to record code, title, and description for each tag and whether any of those fields is required. You must have a minimum of one required tag option. If you later download a sample csv in order to import tags to this set the csv will include columns for the required fields configured here.
Hierarchical levels: Here you can set how many hierarchies will be allowed within the tag set (for example you might have a set of objectives that has 3 levels in its structure like Competency, Program Objectives, and Curricular Objectives). If you use multiple levels, provide labels for each.
Be aware that in many Elentra features when users apply curriculum tags to events or items, they will have to click through the hierarchy to find the appropriate tag. Some features also allow users to select the top or second tier of the hierarchy and automatically apply all tags below to the course.
Tag Display Options:
Here you can specify how tags within this set should be displayed in short or long display mode. Some reports will rely on the different display methods and apply your specifications. To change the display order of the components, type in the %d, %t or %c codes as you wish them to appear. A sample of what the short and long display methods will look like will show on the right.
Mappable Curriculum Tag Sets:
One feature of curriculum tags is the ability to map tags from one set to another to create a map of how your curriculum tags overlap. In this section you can define how the tags in the set you are creating can be mapped to other tag sets. Click the down arrow beside 'Browse All Tag Sets' and check off the sets you want to be able to map to, noting there is a select all feature available. To delete any unwanted tag sets from this list click on the small grey ‘x’ beside the tag set name in the 'Selected Tag Set' panel.
Click ‘Save’ to complete the creation of the new tag set. After saving, you will be redirected to the screen where you can add tags to your newly created tag set.
Navigate to Admin>Manage Curriculum>Curriculum Tags.
Click the checkbox beside the curriculum tag set you want to delete and then click ‘Delete Items’.
Navigate to Admin>Manage Curriculum>Curriculum Tags.
Click the name of the tag set and then click ‘Edit Tag Set’ from the buttons on the right. This will open a page where you can edit the tag set information.
Navigate to Admin>Manage Curriculum.
Select 'Curriculum Tags'.
Click on the name of the curriculum tag set you want to add tags to.
Either import curriculum tags or add individual tags.
From a Curriculum Tag Set page, click 'Import from CSV' and a popup window will offer you a sample CSV template file to download. The template file will include some column headings required for this tag set, but a full list of possible CSV headings include:
objective_code
objective_name
objective_description
objective_order
objective_loggable
non_examinable
objective_status_id
admin_notes\
Complete the file with the appropriate curriculum tags (remember to remove the sample line of text).
Import the file via the already open popup window to quickly create your tag set. To import the tags you can drag and drop the file or browse for it on your computer.
If you are uploading to a tag set with hierarchies, select the parent tag you wish to import additional tags to.
Click 'Import'.
You'll see a green success message with the number of tags created and then you'll be redirected to the tag set page where you can view the newly added tags.
If you want to add curriculum tags to an existing list of tags, you can import a new file with the additional tags. The new tags will get added to the list. Any change to an existing tag (code, name, description) will result in a new tag being created. As such, if you need to fix a typo in a tag, do so through the user interface, not a new csv upload.
From a Tag Set page, click 'Add Tag'.
Tag Details:
Status: Set this as Active to allow its immediate use; if you use Draft status this tag will not be available to users and you'll have to manually update its status when you want it to be available.
Complete the code, title, and description as needed remembering that the availability of each field and whether it is required is managed at the tag set level.
Set the Display Order if needed. By default the new tag will be added to the end of the list of existing tags.
Non-Examinable: At present this can be recorded for reporting purposes and does not interact or impact the functionality of other features.
Loggable in Experience Logbook: Tick this box if this curriculum tag should be available to learners in the Experience Logbook (usually this is relevant to tags that will be used in clinical learning environments).
Map Curriculum Tags: When creating a new tag you can link it to other curriculum tags if the tag set has been built to allow for such linkages (remember that is controlled at the tag set level).
Click on 'Map Curriculum Tags'.
Use the Tag Set dropdown menu to find the tag you want to map to the tag you are editing.
Click off the popup window in order to see the mapping relationship you've added. It intentionally stays open for you to pick more tags as needed.
To delete a link click the small x beside the mapped tag.
Click 'Save'.
Admin Notes: Use this space to record notes about a curriculum tag (e.g. the committee that requested the tag, reason for changes, etc.)
Click 'Save & Close'.
To add a tag in a hierarchy, navigate to a Tag Set page and click the plus sign beside the tag to which you want to add another level of tag. (Depending on whether you use list or table view you will see the plus sign or may need to hover over a tag until menu icons appear on the right.)
Complete the tag details as you would for other tags and click 'Save'.
When building a tag set you can define whether tag title, code, or description are required for each tag added to the set. If you're curious about where this information will display to users, here are some general guidelines for various reports and tools in Elentra:
Curriculum Search: code and title
Learning Events Tab: shows title (currently the filter list is restricted to the 2 objective sets you’ve designated as Curriculum Objectives and Presentations)
Curriculum Matrix: title and description
Curriculum Explorer: title (and description once you click on an objective)
Curriculum Tag Mapping Report: title and description
Curriculum Tag Minutes and Mapping Report: title
Course Website (learner view): title and description
Course Page (no course website built) (learner view): title
Event Page (learner view): code, title, and description
The Curriculum Review Report is being revised for ME 1.15 on to allow for user control over how the curriculum tags display (the report will reflect the Short Display Method you can configure when you edit a tag set).
Toggle between a list view and table view of curriculum tags using the small icons beside the Add Tag button.
In table view, add additional visible columns to the table by clicking on the grid with a down arrow beside it. Adding additional columns can allow you to see id, code, title, description, and an overview of existing links between tag sets.
https://vimeo.com/267800298/7e6ccf2e47
Click on the pencil icon available to the right of the tag (you may need to use your mouse to hover over a tag for the menu icons to appear).
If settings in a curriculum tag set are configured to allow the tags in the set to be mapped to other tags, you can do the mapping from the Tag Set page.
From the Tag Set page click the chain or link icon beside a tag. This will take you to the Map Curriculum Tags tab for this tag.
Use the Tag Set dropdown menu to find the tag you want to map to the tag you are editing.
Click off the popup window in order to see the mapping relationship you've added.
To delete a link click the small x beside the mapped tag.
Click 'Save'.
Note that you can link tags via courses, units, and learning events if you are using an Elentra setting that allows context-based linkages. See more information about this in the Curriculum>Context Based Linkages help section.
Click on any tag to access its details, mapping, admin notes and history.
This history tab records all changes made to the tag and the user who created the change.
After you've opened any curriculum tag using the pencil icon to view its details, you can quickly navigate forward and back to view additional tags in the set using the arrows in the bottom left of the screen. Easily jump to the first or last tag using the double arrow.
To delete an existing curriculum tag navigate to the Tag Set page.
Depending on your view you'll either see small icons in the right or you'll need to hover over a curriculum tag until you see small icons appear.
Click the garbage pail to delete the tag.
Navigate to Admin>Manage Curriculum.
Click 'Curriculum Tags' from the sidebar
Click on the name of the curriculum tag set you wish to export.
Click export.
A csv file will download to your computer; it will include objective id, code, name, description, parent, etc.
The tools within Manage Curriculum are used to build the structure on which many of Elentra's course, event and rotation management and curriculum mapping features rely.
Manage Curriculum allows users to:
Manage curriculum layouts and curriculum periods (a curriculum period is an instance of a layout and has specific start and end dates)
Manage curriculum tracks (a way to identify groups of related courses)
Manage curriculum map versions (a way to capture linkages between curriculum tags relevant to specific periods of time)
Manage curriculum tags (the taxonomies that can be applied to courses, units, learning events, gradebook assessments, exam items, and assessment items included on forms)
Map one curriculum taxonomy to another curriculum taxonomy (e.g. map national standards to program objectives)
You can watch a recordings about Curriculum Management at collaborate.elentra.org (login required).
Elentra allows you to map relationships between curriculum tags so you can show connections across your curriculum framework. You might map different levels of your own curriculum to each other (e.g. map program objectives to course objectives) or you might map your school curriculum and national standards (e.g., map your program outcomes to the AAMC Physician Competency Reference Set). This mapping is completed through Admin > Manage Curriculum and creates organization wide mappings.
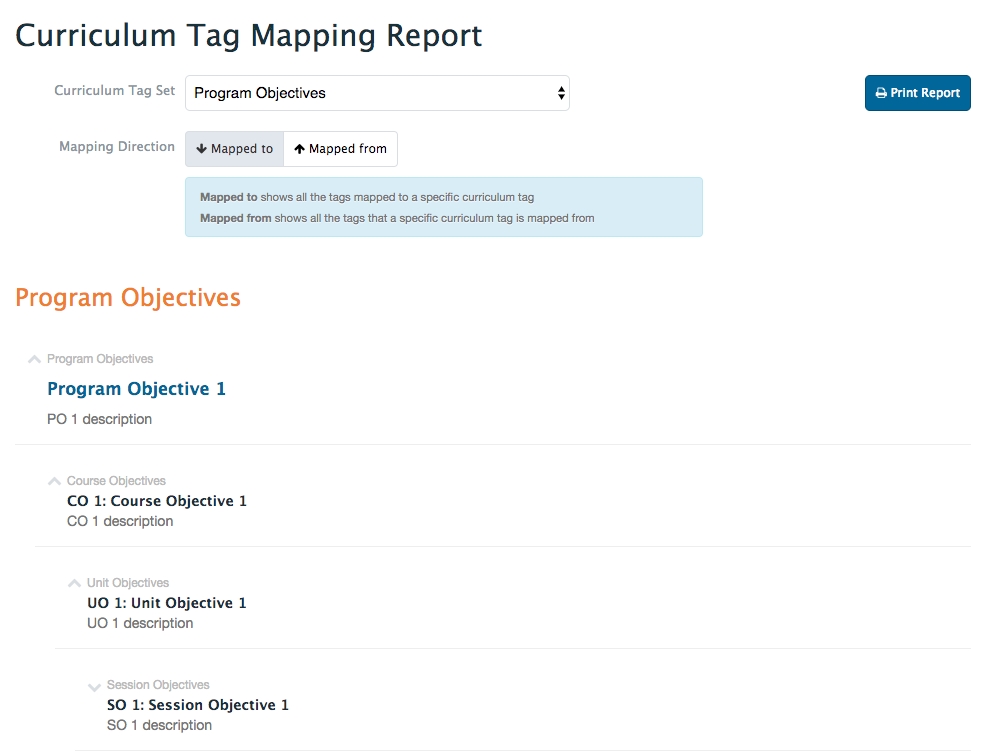
Please note that the intended functionality of Elentra is to take a top-down approach in mapping curriculum tags. For example, you might have exit competencies, program objectives, course objectives and sessional/event objectives. You'd start with your exit competencies and map the relevant program objectives to them, then map the course objective to the program objective, etc.
After these mapped relationships are recorded they can be reported on via the Curriculum Tag Mapping Report.
Once curriculum tags are built in your organization, you can assign them in modules across Elentra. You can assign curriculum tags to:
Courses
Units
Events
Gradebook assessments (in a course)
Exam items
Assessment items included on forms
Learning Objects (i.e., online modules created in another tool)
The steps to apply curriculum tags in each of these areas is described in the relevant help section for each feature. Various reporting options to view this information also exist across the various features. Some reporting options are briefly described below.
Commonly used tools accessible to all users include Curriculum Search, Curriculum Explorer, and Curriculum Matrix.
Curriculum Search: Allows you to search for a key term and apply curriculum tags as filters.
Curriculum Explorer: Shows which objectives have been assigned to courses, tagged in events, and tagged on gradebook assessments (view of assessments is not available to learners).
Curriculum Matrix: Shows which objectives have been assigned to specific courses.
Additional tools are available only to specific users. Staff:Admin users will be able to access all of these, but faculty access will depend on the faculty role and course affiliation.
Curriculum Tag Minutes and Mapping Report: Shows which tags have been applied to events in a course.
Curriculum Review Report: Shows events, curriculum objectives, and clinical presentations within a course. (May require modification to use at your institution.)
Assessment Objective Summary Report: Lists assessments within a gradebook and provides their descriptions, and the curriculum objectives applied to them. (May require modification to use at your institution.)
Exam Data (Information and Settings): Provides an overview of the curriculum tags used on an exam and the number of questions tagged with said objectives.
Exam Results Curriculum Tag Report: Provides an overview of learner performance with regard to the curriculum tags applied to the questions.
Another curriculum mapping option exists in Elentra and that is the ability to contextually map one tag to another. This allows you to assign a tag to something like a course or event, and then link that tag to another tag in that specific context.
For example, for a learning event about fever in a child, you might assign a tag about taking a patient history. Then you could contextually link it to other tags (e.g. pediatrics, fever, etc.). This design can allow schools to keep a relatively concise list of overall learning objectives, then contextually link them to show how they will by applied in a specific context.
Reporting options for contextually linked tags are currently limited, however we intend to gradually expand the reporting options over time.
curriculum_tagsets_allow_attributes
curriculum_tagsets_max_allow_levels
curriculum_tags_default_status
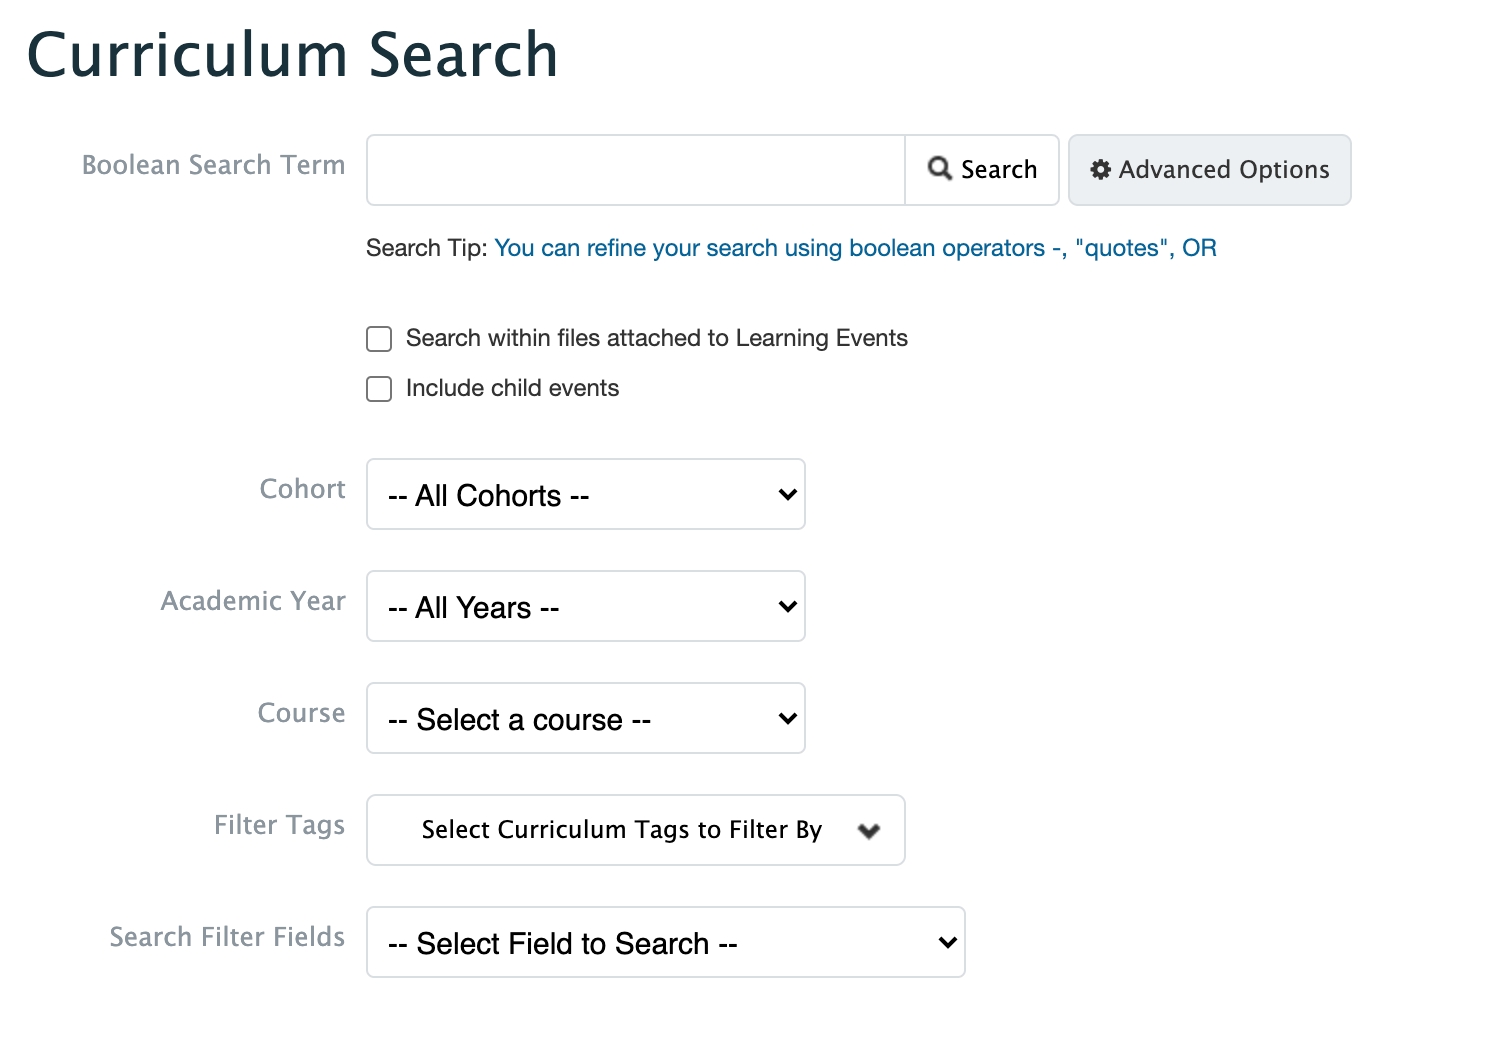
The Curriculum Search tool is available to all users of Elentra by default and uses boolean search logic to look for content within Learning Events. The search algorithm scans Learning Event titles, descriptions, required preparation, and mapped curriculum objectives. Additionally, through Advanced Options > "Search within files attached to Learning Events", users can look search term matches within the contents of PDF, PowerPoint, Word, and Text documents attached to Learning Events.
You can watch a recording about Curriculum Search at collaborate.elentra.org (login required).
Type your search term(s) into the search space.
By default Elentra requires a minimum four character word to search. This is to prevent returning thousands of results for searches of three or fewer letters.
If you want your search results to include files attached to Learning Events, click 'Advanced Options' and click the checkbox just below the search bar.
Click 'Search' and your results will display on the screen.
Elentra searches event titles, event descriptions, and curriculum tag names for the word you entered.
Your search term will be highlighted if it is in the description of a relevant learning event.
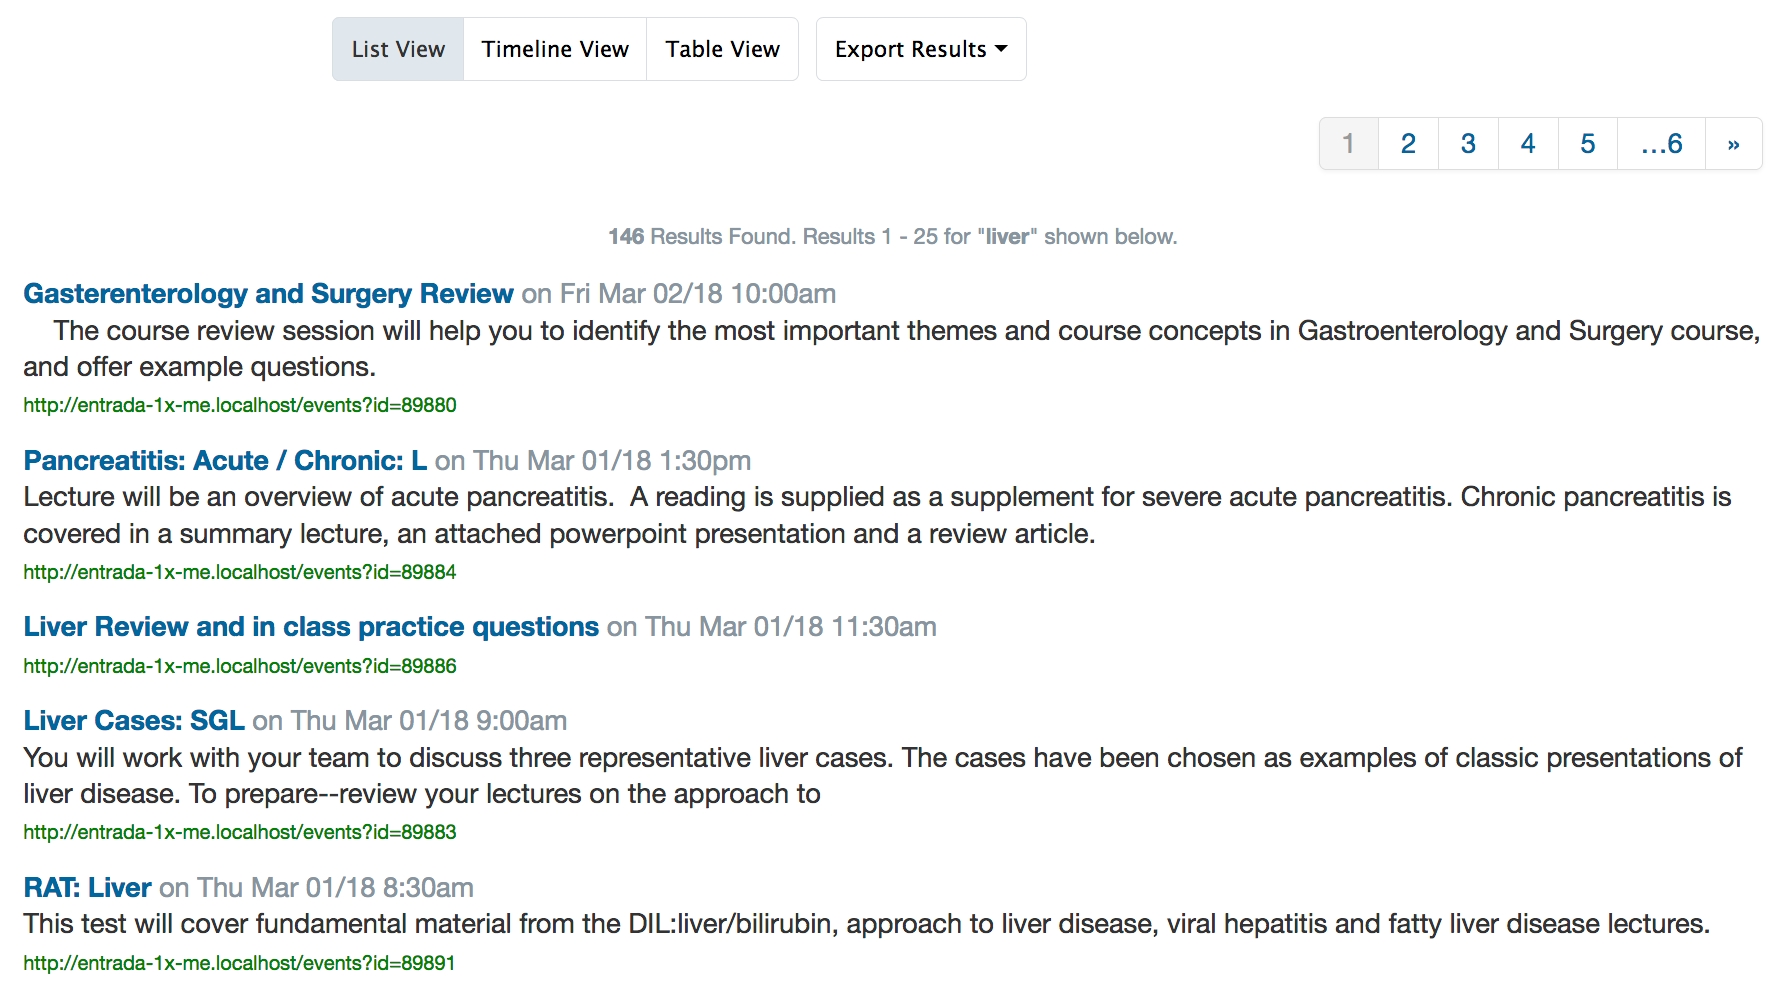
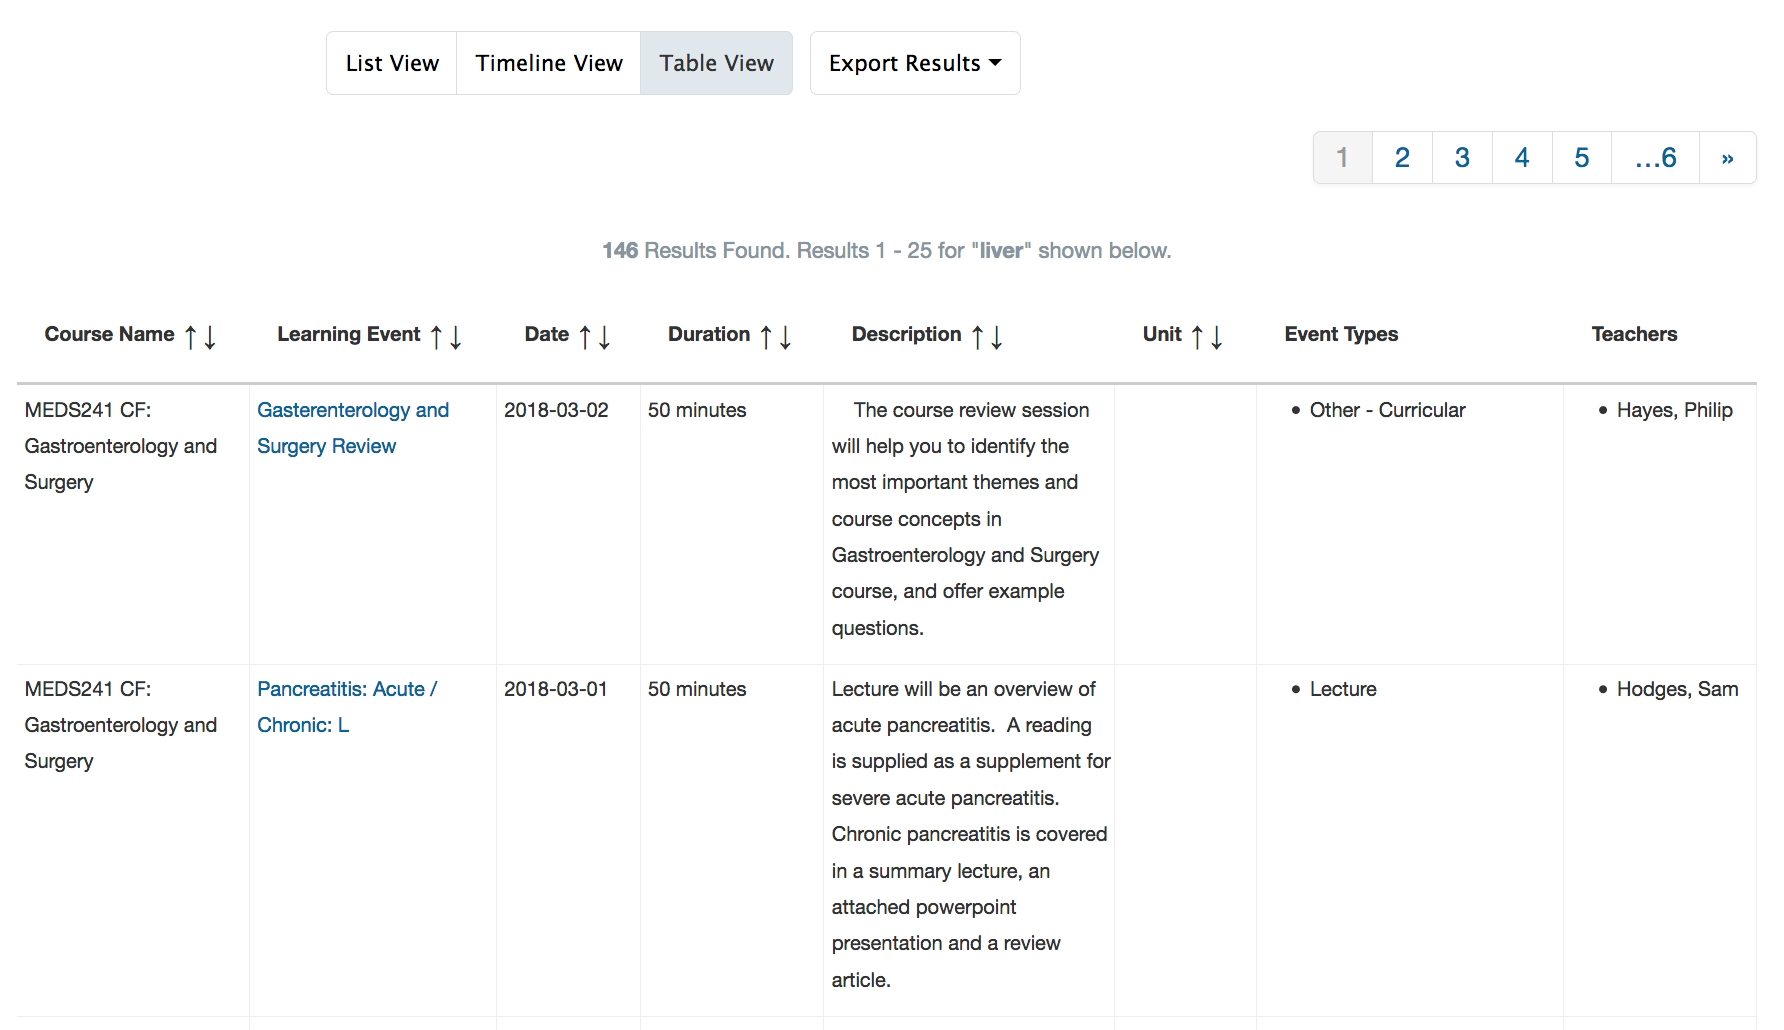
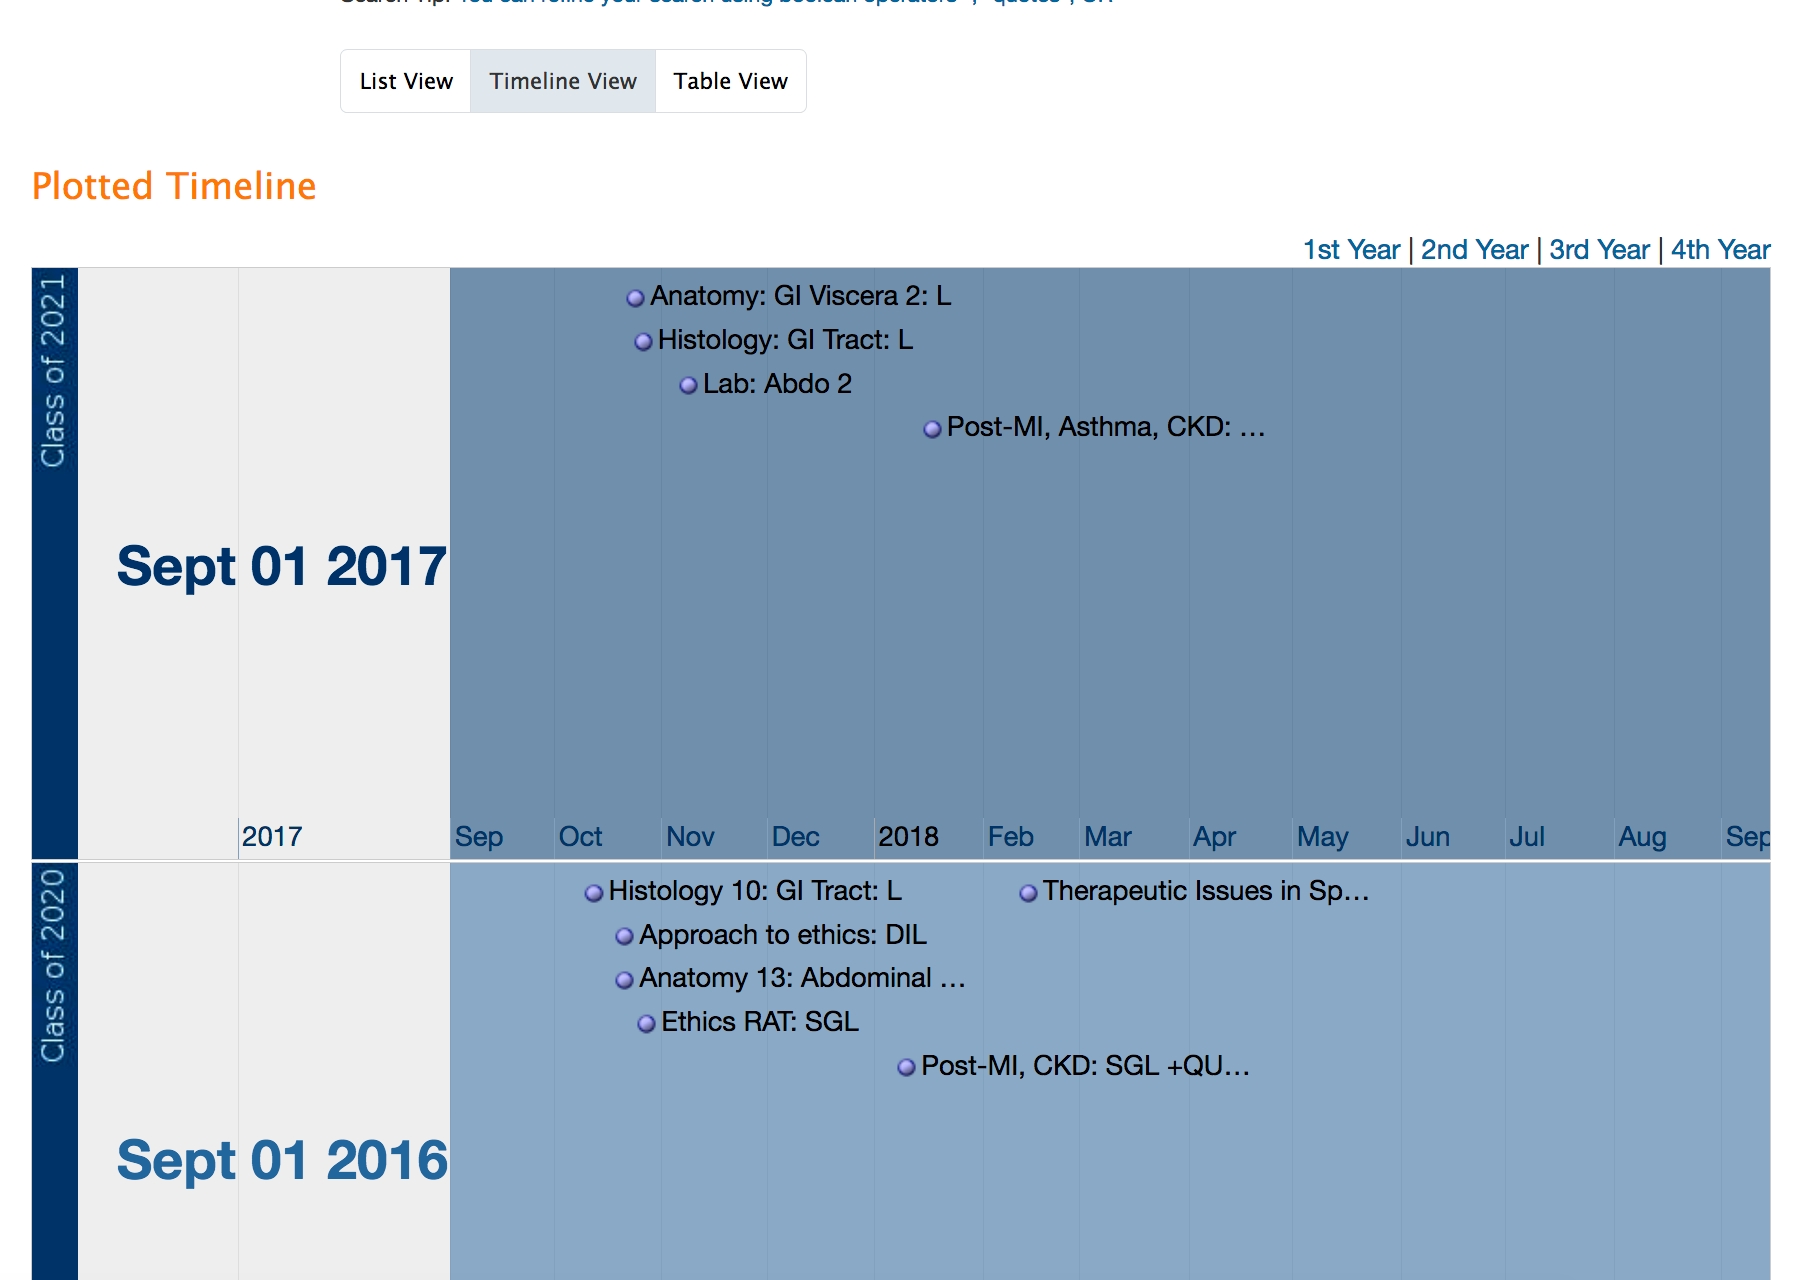
You can toggle between three different views of your search results:
List view: This view shows you a list of all returned events. Export your results as desired.
Timeline view: This view displays the returned events by cohort on a timeline. Scroll through the results or quickly jump from year to year using the links on the right above the timeline. Mouseover an event for its course affiliation and length. View a total count of results returned per cohort in the left sidebar.
Table view: This view shows you course name, learning event, date, duration, description, unit (if enabled), event types, and teachers. Export your results as desired.
Advanced options let you further refine your curriculum search results.
New in ME 1.28!
You can now search within specific Curriculum Periods from the Advanced Options. The selector will allow you to add as many Curriculum Periods as needed, as long as they include Learning Events.
Click 'Advanced Options'.
Select parameters to apply to your search including cohort, academic year, curriculum tag sets, filter fields, course and weeks (weeks will only appear if units/weeks in enabled in your installation).
To add a Tag Set click on the name of the desired tag set and click 'Add' just below the list of tag sets. You can hide this list as desired by clicking 'Hide List'. Adding a Tag Set to your search means only events with something from that tag set will be included in the results.
To use the Search Filter Fields and Search Filter Operator options, imagine creating a sentence to limit your results. For example, "If Event Description is ----" return results. You can create multiple filters to apply to a search and the returned results will only include events that meet the filter parameters.
The Search Filter Operator options include: is, is not, contains, does not contain, starts with, does not start with, ends with, and does not end with.
After you've set your filters, click 'Search'.
To clear just some existing filters click the small x on each filter card. To remove all filters, click 'Reset'.
Make sure to click 'Reset' to clear all filters before beginning a new search.
An example of using advanced search might be that I want to find all events on a certain topic NOT taught by one faculty member. I may already know that Dr. Greene teaches about heart disease but I want to find other instances in the curriculum where another faculty member is addressing heart disease. If I search for "heart disease" and add a "Teachers is not Dr. Greene" filter, the results will give me what I want.
Elentra includes the ability to link multiple repeating events in a parent-child relationship. This is most often used when small groups of learners will complete the same activities in repeating learning events. For example, there may be 10 events scheduled for 10 small groups but each event is essentially identical in terms of content, curriculum tags applied, etc. If you use the parent-child feature some reports will look only to the parent event to collect data and therefore help to report accurately from the perspective of a single learner.
When you export events from Curriculum Search you can choose whether to include or exclude child events.
Searching for key content in your curriculum, and exporting the results can be really useful for external reporting (e.g. research projects, interest group surveys, coroner's office, etc.). Similarly, these exports can help in gap analysis and planning an intentional curriculum.
The way curriculum tags are stored in Elentra does impact visibility on some pages and the available reporting options. This has grown more complex with the introduction of tags added through a Curriculum Framework for the purposes of Competency-Based Education.
Curriculum Search
Learning Events that match the search term and filter requirements set by the user
When using a curriculum tag as a filter, indirect mappings will not be included in search results
Curriculum Explorer
Courses, Events, Gradebook Assessments (admin view only)
Shows direct and indirect mappings
Curriculum Matrix
Tags assigned to courses
Shows results for a hierarchical tag set; does not show indirect mappings
Hierarchical tag set imported through Admin > Manage Curriculum > Tag Sets
Curriculum Tag Mapping Report
Course Page will display any assigned children with their parents
Mapping from one tag set to another in Admin > Manage Curriculum
Admin > Manage Curriculum; when viewing a tag set, toggle to table view and add columns to see mapped relationships
Curriculum Tag Mapping Report
Curriculum Tag Mapping Report cannot show both paths if a parent tag is from a hierarchical tag set AND has a mapped relationship to another tag set (you lose visibility of the child tag from the hierarchical tag set)
Creating an Objective Tree using Competency-Based Education Tools
Available from a course CBME tab and in some cases in the EPA Encyclopedia
Curriculum Tag Mapping Report NOT supported unless manual mapping in Admin > Manage Curriculum also completed
Hierarchical tag set structure imported through Admin > Mange Curriculum > Tag Sets
Courses
Course Page (without website), assigned tag will display with all its parent tags also displaying
Course Website Learning Objectives Page (added tag will display with all its parent tags also displaying)
View tags mapped to courses in the Curriculum Matrix
Curriculum Explorer (direct and indirect mappings)
Units
Unit Page (direct mappings only)
Events
Learning Event Page (an assigned tag with no children will display on its own; if a tag with children is assigned to an event, the children alone will display without showing the parent tag)
Curriculum Explorer (direct and indirect mappings)
Gradebook Assessments
Curriculum Explorer (direct and indirect mappings)
Assessment Summary Report (direct mappings on assessments, displayed by course)
Student Objective Competency Report (limited to direct mappings)
Exam Items
Admin. view only - Exam Data blueprint of tags (direct mappings only) within a single exam
Learner Exam Report - performance per tag (optional to release)
Assessment and Evaluation Items
Admin. view only - use tags as a filter
Portfolio Artifacts
Adding tags from a hierarchical tag set requires numerous clicks and there is no search function in the tag selector
No reporting, view individual artifacts to see assigned tags
Only the tags assigned (whether a parent or a child) are displayed in the user interface
Learning Objects
Adding tags from a hierarchical set requires numerous clicks and there is no search function in the tag selector
No reporting, view individual learning objects to see assigned tags
Only the tags assigned (whether a parent or a child) are displayed in the user interface
Hierarchical curriculum structure created by importing flat lists of tags and mapping them to each other in Admin > Manage Curriculum
Courses
Course Page (without website), assigned tag will display (no mapped relationships display)
Course Website Learning Objectives Page (no mapped relationships display)
View tags mapped to courses in the Curriculum Matrix (only assigned tags display information, no indirect mappings will display in the Matrix)
Curriculum Explorer (direct and indirect mappings)
Units
Information pending
Events
Learning Event Page (only assigned tags display, no indirect mappings will display on an event page)
Curriculum Explorer (direct and indirect mappings)
Gradebook Assessments
Information pending
Exam Items
Admin. view only - Exam Data blueprint of tags (direct mappings only) within a single exam
Learner Exam Report - performance per tag (optional to release), direct mappings only
Assessment and Evaluation Items
Admin. view only - use tags as a filter, direct mappings only
Portfolio Artifacts
No reporting, view individual artifacts to see assigned tags
Direct mappings only
Learning Objects
No reporting, view individual learning objects to see assigned tags
Direct mappings only
Hierarchical curriculum structure created using a Curriculum Framework and a Course Objective Tree
Courses
Can be accessed to add to a course; will only show results on Curriculum Matrix if assigned on Course Curriculum Tab (in addition to being in Course Objective Tree) *currently tested with 1 version only
Units
Information pending
Events
Can be accessed to add to events; however, cannot access as filter on Curriculum Search
Tags assigned to events will return results in Curriculum Explorer, but only for direct mappings
*currently tested with 1 version only
Gradebook Assessments
Information pending
Exam Items
Tags are available to be selected and are displayed in Exam Data (direct mappings only)
*currently tested with 1 version only
Assessment and Evaluation Items
Tags are available to be selected, and can specify course and version to use
Admin view - use tag as filter
Portfolio Artifacts
No reporting, view individual learning objects to see assigned tags
Learning Objects
No reporting, view individual learning objects to see assigned tags
Tag selector includes a Course and Version filter so CBE tags are supported

