Creating a Stage
Walkthrough
Once you've created a Lottery for your specified curriculum period, your next step should be to create a Stage. To get started from the Lotteries Overview, click the Manage Stages button on your Lottery Card. This will take you to the Stages Overview, which displays a simplified card representing the Lottery you are currently focused on, and a list of stages underneath it, called the Stage Schedule.
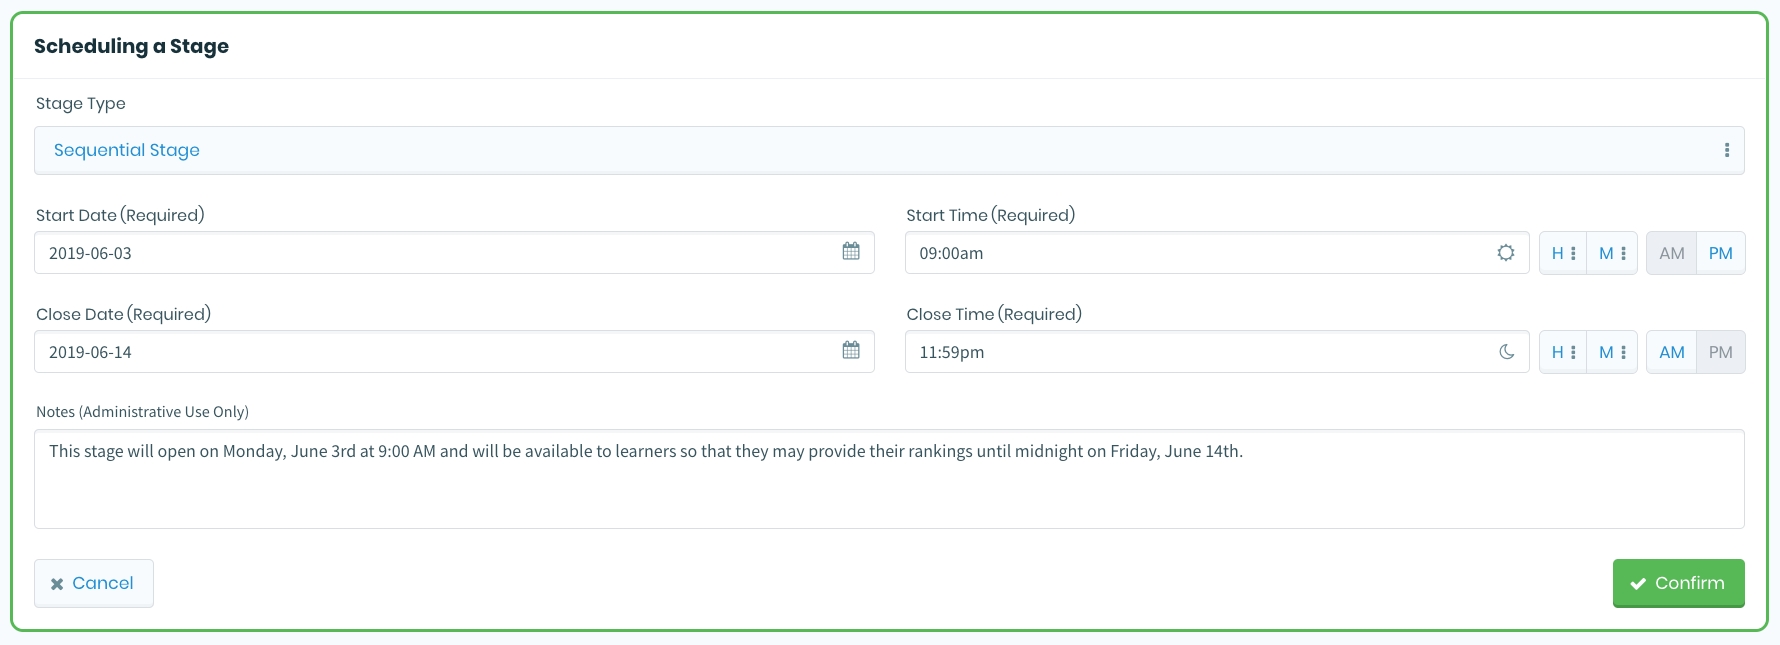
Once you've arrived in the Stages Overview, click the action button off to the right-hand side, labelled Schedule a Stage. This will open up the form for scheduling a stage.

This form will prompt you for some details in order to proceed. The first step is to determine which Stage Type should be used. Currently the only option is "Sequential", which means that each Option will be comprised of a sequence of rotations. In future Elentra ME updates, you will be able to choose alternatives to "Sequential", such as "Singular" (each Option consists of a single rotation), or "Site" (learners rank their preferred sites for rotations, as opposed to Options containing rotations).
Moving on from the Stage Type field, you'll need to set a couple of date and time pairs, one for the Start Date/Time, and another for the Close Date/Time. These two moments in time represent the range of time that the stage will be available to learners. When the value set for the Start Date/Time is reached, the stage's status will change to "Open" and learners will begin the process of logging in and ranking the Options that have been created for the stage. This means that you should always ensure that you schedule a stage's starting point far enough in advance that you have enough of time to manage your Options beforehand.
To set a date and time, begin by clicking the calendar icon to the right of the date input. This will open a small calendar. Click on any valid day to set the desired date. You can use the single chevron arrows on either side of the current month to navigate to the previous or next month, while the doubled chevron arrows will achieve the same result, but for the year.
You may also edit the time of day by using the H (hour) and M (minute) drop-downs to select the desired 12-hour time, and use the button group to the right to toggle between AM and PM.
The Notes field is entirely optional, but provides administrators with a handy place to add any additional, relevant information that they feel is helpful. Once ready, click the Confirm button. After the process completes, you will be returned to the Stages Overview, where you will now see your newly created Stage Card in the list. As indicated by the status badge ("Options Required"), you're now ready to start creating and managing Options.